Saturday, February 27, 2010

Weekend Indulgence - Chocolatey Goodness with a difference!!

I love chocolate desserts as my blog posts should show...most of my desserts have chocolate in some shape or form in them...but recently, with the move to eating healthy, I am trying to find healthful ingredients in all my chocolate desserts.

So I was intrigued when I came upon this recipe for Chocolate Mousse in a fitness magazine which had no cream or half and half or anything else that is fattening in it! The main ingredient was....tofu!!! For a long time, I did not make this one because I was not sure if the texture of the mousse would be well...anything like mousse, with just tofu in it. When I tried it finally, for the first time - I found that it was actually very good...it had a creaminess to it that was very surprising for tofu. But to make it even better(well...perfection is good, right?!) I added bananas the next time and Voila...I get one awesome recipe for chocolate mousse! I served it for a weekend dinner(last weekend) with some friends and everybody wondered how much cream I had used...boy, were they surprised when they found it was tofu...

So, here goes with the recipe...hope you like it as much as my family and friends did!


Recipe for Chocolate Mousse with a difference:
Serves: 8
Prep/cook time: 10 minutes

Ingredients:
-----------
Super-Firm Tofu - 1 pack cut into small pieces(may also go by the name extra-firm tofu)
Semi-sweet chocolate chips - 1/2 cup
Unsweetened dark cocoa powder - 1 1/2 tsp(I used Ghirardelli)
Banana - 1 sliced thinly
Vanilla essence - 1 tsp
Sugar - 2 tsp(optional for extra sweetness)
Low-fat milk - 2 tsp


Method:
--------
Blend the tofu until it turns silken-smooth...this is very important in order to achieve the soft consistency of mousse...not blending enough will give it a gritty consistency. This step takes a few minutes.


Then, add all the other ingredients and blend until well-incorporated and thoroughly smooth. At this point, the mousse will have a very thick consistency.


Pour the mousse into serving cups or ramekins and cover each serving up with plastic wrap so that the top layer of the mousse remains smooth.


Chill overnight in the refrigerator and serve cold, if possible for best taste.


Garnishes could be cherries, candied fruit, chopped nuts, grated dark chocolate/white chocolate, toffee bits...for the kids, you could even serve with a beautiful topping of whipped cream(that always gets an awesome reaction from them)

Thursday, February 25, 2010

More Awards + Announcing Yummies from Blogosphere Series

I have been thinking of this series: Yummies from Blogosphere ever since I recently received some more beautiful awards from our fellow blogger Swapna Sridhar who has an awesome blog , where she posts creative recipes and crafts...do check it out if you have not done so already. Thanks a million, Swapna!

But I have been embarrassed about accepting these beautiful awards because I am such a newbie blogger. Then I thought that the best way to celebrate these awards would be by showcasing the awesome talents of my fellow bloggers whose inspiration and encouragement, is the main reason behind my passion for blogging.

For the last several months, I have been browsing different blogs where I drool over all the goodies created by our blogger friends...I think "Ooh, I would love to try that" or "I have never seen that recipe before" and I bookmark and I bookmark...you get the idea...sometimes I try these beautiful recipes but lots of times, I am so busy trying out my own kitchen experiments, that I dont get a chance to appreciate the efforts of my fellow bloggers enough. Oh...I should note here that I have not blown up my kitchen from my recipe creation experiments that I mentioned earlier(yet!!!) 

Anyways, as a blogger and passionate cook, I would love to hear somebody else's experiences with my dishes, and I am assuming most bloggers would love to hear others' experience and thoughts with their recipes too...so here goes... I am planning to do a new series: Yummies from Blogosphere -  where I will try out one of my favorite recipes from those already posted by my fellow bloggers every weekend and blog about my experiences with that dish and also my degree of success with it every Monday going forward.
By this series, I am hoping that my family will get a chance to definitely taste some of the truly tried and tested recipes and also my audience will get a chance to browse glorious recipes that they may have missed seeing from the original blogger. Of course, I will be providing a link to the original blogger's fabulous post.

I also would like to reach out to my fellow bloggers and ask for their tips if I am about to try one of their wonderful recipes...

I know I am taking on a challenge here, because I may not be able to achieve the same degree of success that the original blogger had with the recipe and I may not be able to capture the images of that dish, as beautifully either...but I would definitely like to try!!!

Have I bitten off more than I can chew - with this series???

Here are my awards and now I would like to share them with all my awesome blogger buddies...hope you will accept them and I hope to do justice to your fabulous dishes...that you have taken so much time and effort  to prepare, take pictures and post...


Wednesday, February 24, 2010

CROWD - PLEASING PASTA SERVED WITH GARLIC BREAD AND GRILLED EGGPLANT!

I had not cooked pasta for the last few weeks which was surprising for me...especially since it brings the whole family to the dinner table like a magnet, everytime... irrespective of whether it is mac n cheese, spaghetti or penne  pasta...you name it, they love it.

So, when the kids mentioned pasta, I went hunting in the pantry and came up with fettucini noodles...I normally make fettucini with bell-pepper and/or spinach...but didnt have either of those veggies so came up with the idea of trying some new veggies to go into the alfredo sauce (for the fettucini)...had some garlic bread too.

My alfredo sauce has no cheese in it, it is quite light and definitely has a saucy but not very heavy consistency...very low-fat...you can of course, add cheese to it, if you wish. I normally add the cheese as a topping, only. This is the recipe I served one day last weekend...hope you enjoy it as much as my family did...

This recipe goes to the event: Pasta Party hosted by Jyoti V. of Panch Pakwan.


RECIPE FOR:
BAKED FETTUCINI PASTA WITH CAULIFLOWER AND BROCCOLI IN LIGHT ALFREDO SAUCE  -

Serves: 5 to 6
Prep/cook time: 30 to 35 mins.


Ingredients:
1 lb.fettucini noodles (I used whole wheat fettucini)
1 1/2 cups low-fat milk
1 tbsp all-purpose flour
1 to 2 tsp butter
3 to 4 cloves garlic cut finely
1tbsp red pepper flakes
1/2 head of broccoli cut into medium size florets
1/2 head of  cauliflower cut into medium size florets

For topping the pasta:
3 to 4 tbsp grated Parmesan cheese
parsley or basil - few leaves(optional)
breadcrumbs or toasted croutons - 2tbsp

For seasoning
1 tbsp. light olive oil, salt & black pepper to taste


Method:
1. Start large pot of water to boil for cooking noodles. When water starts to boil, add a little salt(to season pasta) and then add the fettucini itself. Let cook for 6 to 7 minutes (whole wheat pasta takes a minute or two longer than the regular pasta to cook). Take off stove and drain pasta when almost done(but not fully cooked - pasta needs to be baked finally)

2. In a pan, add the olive oil, cut/crushed garlic and red pepper flakes(and any additional salt) and saute for a minute or two. Add the vegs. before the garlic starts turning brown. Let cook for 3 or 4 minutes. Then, add the drained pasta to it. Set aside. Now, set oven to pre-heat at 350degrees Fahrenheit.

3. In another non-stick pan, add the butter and flour and nicely stir together to remove any lumps from the flour...when the mixture starts bubbling and almost starts changing color, add the milk and let simmer for 3 or 4 mins. Keep whisking in between, to prevent the sauce from sticking to the bottom of the pan. Take off the stove when well-mixed and the sauce has become thick. Dont leave the sauce unattended when it is boiling because then the sauce starts to become too thick and pasty(not good!)

TIP: The sauce takes typically 3 to 4 minutes to thicken up nicely...beyond 5 mins...could start sticking to pan and become pasty.

4. Once the sauce and the pasta-veg mixture is ready, grease a baking pan with light cooking spray(or butter, if you wish) and add some sauce on the bottom.

5. Now, add the pasta-veg. mixture over the layer of sauce and then, finally add a final layer of the remaining sauce.

6. Top the pasta with the parmesan cheese, black pepper, basil/parsley(optional) and breadcrumbs/croutons. Cover the baking dish with aluminium foil and bake for 15 - 20 mins(at 350F), until the top turns golden brown.

Serve warm or at room temperature with garlic bread or soup or side of vegs...I served with a side of garlic bread and grilled eggplant(recipe follows)

For grilled eggplant:
Cut 1 big - sized eggplant in round slices...arrange on baking sheet lined with foil. Sprinkle a mixture of breadcrumbs, red pepper flakes, little tomato puree and parmesan cheese on top(Sometimes I use mozzarella cheese too). Sprinkle some light olive oil on the slices of eggplant and bake at  350 F for about 10 to 15 mins...till nice and crispy. Season with salt and pepper as soon as it comes out of the oven.

Tuesday, February 23, 2010

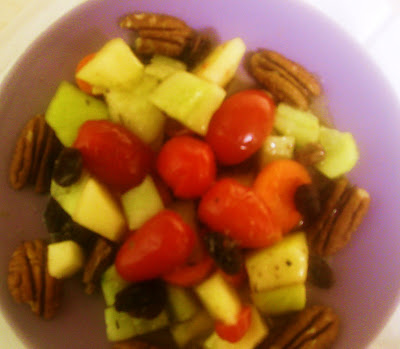
10 Minute Recipe Series:Vibrant Mixed Salad with a healthy punch of anti-oxidants

Whenever I add a salad to our meal, I try to make it as colorful as possible...you know, so the kids will atleast let me put it on their plates because they like the colors...once it gets on their plates, of course, chances are it has some hope of making it to their tummies!!! Otherwise, it is "Can I have something else to eat?" and of course, the other high feature on the list of complaints about food being - "This doesnt look cool." Then, I launch into the usual lecture about how we could not open our mouths to do anything except eat when we were at the dining table as kids...sigh!

Of course, the more colorful the salad is, the greater nutritional punch it can pack - from a variety of veggies and fruits. Yes, I like to combine veggies and fruits in salads...not just because of the colors, but also because it is so tough to get kids to eat both...so any help one gets from combining them, the better.

Of course, when I am starting to mix things up with fruits and veggies...I dont stop there...I also sneak in some dry fruits and nuts for the anti-oxidant punch!!!

Also, here I like to use a simple salad dressing combining lemon juice and honey...which is great because I understand that one of the health benefits of honey is in regards to how it can help people lose weight. Believe it or not, by combining honey with lemon juice, the body can more easily digest the fat in various foods. And I can always use that benefit...another sigh!

The awesome thing is that, the flavors are so varied, it does not need any addition of cheese, croutons or any of the other flavor enhancers for salads!!!

This salad I have here is not only colorful...it also gets ready in under 10 minutes...a great accompaniment to breads, pastas, rotis and even great as a snack by itself!!!

Recipe for Vibrant Mixed Fruit and Veggie Salad:
------------------------------------------------------------------
Serves: 4
Prep/Cook Time: 10 minutes

Ingredients:
Carrots - 1/2 cup cut into thin slices
Grape Tomatoes - 1/2 cup sliced in half (or any other firm tomato variety cut into small chunks) 
Cucumber - 1/2 cup cut into small chunks or slices
Apples  and / or Pears - 1/2 cup cut into pieces(I used the variety Golden Delicious but any crisp yet juicy variety should be good)
Raisins - 1/2 cup seedless
Pecans / Walnuts - 1/4 cup cut into small pieces
Grapes(optional) - 1/2 cup(you could also do half raisins and half grapes or just omit the grapes altogether - both ways work fine)

For seasoning / salad dressing: Mix /whisk together all of the following and set aside -
Light olive oil - 1  tbsp
Lemon juice - 2 tbsp
Honey - 1 to 2 tbsp(depending on how sweet you like the salad to be)
Crushed Black Pepper - 1 tsp
Salt to taste

Method:
Add all the cut veggies. fruits, nuts and dry fruits together in a bowl.

Pour the seasonings / salad dressing on top of the salad.

Whoo Hoo!!!

Note: This salad is better when consumed immediately or within an hour or two of preparation, otherwise the apples start turning brown.

I wonder how my blogger friends add punch to their salads???!!!!


Sunday, February 21, 2010

Back to the Grassroots of South Indian Cuisine: One Hot Curry !!!

South Indian cuisine has traditionally been replete with spicy foods. The foods that I see nowadays in the South Indian restaurants totally lack the bold and fiery nature of the foods that  I used to remember coming out of my grandmother's kitchen. Of course, the reason for that being - the restaurants have to cater to all kinds of palates and so they try to stay middle - of - the road. But for someone who has grown up with the bold flavors of multiple spices - restaurant fare does seem tame...which is why, I try not to order South Indian curries when we go out to eat.

Of course, with the passage of time and changing lifestyles and the move to less spicy cooking in a lot of households...it is sometimes not easy to find those genuinely spicy[but Oh, so tasty :-) foods!!!] nowadays, cooked at home or in restaurants.


One such curry which is decidedly fiery is "Vattral Kuzhambu".  This curry is definitely only for the brave of  heart and strong of stomach...yet it appeals to me on different levels - it is tangy, spicy and also has a hint of sweetness(a touch of jaggery, being the reason behind that) Also I tend to add another dimension of taste that is bitterness, by adding a significant quantity of fenugreek seeds to it...thus combining the spicy nature of the curry with the known nutritious benefits of the bitter fenugreek seeds. Basically, in our family we sometimes combine two different traditional curries - Vattral Kuzhambu and Vendhaya Kuzhambu to make Vendhaya Katthirikkai Vattral Kuzhambu - the name is quite a mouthful but it is an easy enough curry to prepare and it packs quite a nutritional wallop in the form of the fenugreek seeds.

Fenugreek is  a great aid to digestion because it contains a non-dissolving fiber. It is able to lower levels of harmful cholesterol and to regulate blood sugar levels. It is also believed to be beneficial for treating bronchitis, allergies, and congestion.

With all these nutritional benefits, is it any wonder that I prepare this curry quite often at home. Of course, I guess I have to admit that I crave the spice that comes along with the nutrition in the curry!!!

This recipe is off to the CWS - Fenugreek Seeds Event guest - hosted by Denufood and started by Priya's Easy N Tasty Recipes.


Recipe for Spicy South Indian Curry with Fenugreek Seeds and Eggplant(Vendhaya Katthirikkai Vattral Kuzhambu):

Serves: 3 or 4
Prep/Cook Time: 30 - 35 minutes

Ingredients:
-----------
Shallots - 6 to 8 peeled
Round, small eggplant - 3 or 4 cut into small pieces 
Tamarind water - 2 cups
Toovar Dal(red gram dal) - pressure cook for 2 whistles and keep aside
Jaggery - small piece

To roast and grind into fine paste:
Fenugreek seeds - 1/4 cup
Red chillies - 5 or 6
Urud Dal (split black gram) - 2 tsp
Black pepper - 1/2 tsp
Coriander seeds(dhania) - 1tsp
Grated coconut - 2 tbsp

For seasoning:
Mustard(rai) - 1tsp, Urud Dal - 1tsp, Red chilly pepper - 1no.(optional), few curry leaves, asafoetida(hing) - small piece soaked in water, salt and turmeric, gingelly oil or til oil - 2tsp

Method:
--------
In a pan, add the oil and when it heats up add all the seasonings except salt and when the mustard starts to crackle, add the shallots and eggplant and let it cook till the shallots and eggplant turn a little brownish in color(almost cooked).

Add the tamarind water and salt and let it boil well for 8 to 10 minutes on medium high heat.

Then, add the ground paste and jaggery and let the mixture cook for another 5 minutes.

Finally add the cooked toovar dal(red gram dal) to the curry and let it boil for a minute or two before switching off the heat.

This curry is an awesome accompaniment to rice as well as rotis or chappathis.

Note: All ethnic items available at Asian/Indian grocery stores.

Friday, February 19, 2010

Comfort Foods Series #2 - Traditional and Delightful South Indian Lentils and Veggies Curry(Molaguttal)

I guess it is my Southern Indian background which makes me reach out to the traditional tastes and flavors that I remember from my childhood, again and again...especially on the days that I am more harried and stressed than usual, I always find myself making these familiar comfort foods...and most of the time(if not always) they include some combination of lentils and veggies.

The sights and sounds of our old family home in Kerala(India) come back to me every time I make these comforting dishes and though I dont get to go back there very often... I still find myself mentally transported there, to the land of everlasting lush greenery, coconut palms and mango trees...which are never far away from my mind.

Molaguttal is one such traditional Tamilian/Keralite dish(made mostly by Tamilians settled in Kerala for many years). It is a great curry that can accompany rice or chappathis/phulkas or even, parathas. Traditionally, it is made with veggies like white pumpkin, cabbage or spinach either by themselves or in some combination but I have also successfully used veggies like cauliflower, green peas, carrots, chayote(aka chow-chow or bangalore kathirikkai) and even, broccoli.

I find myself making this dish more often nowadays, because the kids seem to love this dish and eat more of it compared to a lot of other dishes...maybe it is the simplicity of its taste that makes it appealing to them. I dont question it at all, I just tend to make it almost every week and find it disappearing before I know it...which is a definite vote of confidence for  me!!!


Here is the recipe:


Molaguttal ( Southern Indian Curry with lentils and veggies) -
-------------------------------------------------------------
Serves: 4
Prep/cook time: 20 to 25 mins.


Ingredients:-
1/2 to 3/4 cup of toovar dal(split yellow lentils/red gram)- pressure cooked for 3 whistles and kept aside
1/2 cup shredded cabbage1/2 cup chopped methi(fenugreek) leaves
1/4 cup diced carrot


For grinding into fine paste:-
1/4 to 1/2 cup of grated coconut(fresh or desiccated)
1/4 cup cummin seeds(jeera)
3 or 4 red chillies (Asian/Indian variety long, thin dried chillies)
1 tsp urud dal(split black gram dal)


For seasoning:-
1tsp Black mustard seeds(rai)
1tsp cummin seeds(jeera)
1tsp urud dal(split black gram dal)
Few curry leaves
2 dry red chillies( 1 chilli if you would like it to be less spicy or just omit this item totally)
Oil - 1 to 2 tsp


Turmeric powder - a pinch
Salt


Method:-
In a pressure cooker, add the vegetables and turmeric and enough water to cover up all the veggies and pressure cook for 3 whistles(till veggies are almost cooked).


Alternately, you could cook all the veggies and turmeric with water in a pan till they are almost fully cooked(takes about 7 to 8 mins on medium - high heat)


Take the ground fine paste of cummin seeds, urud dal, red chillies and coconut and add it to the veggies alongwith salt and let come to a boil(takes about 4 to 5 mins on medium high heat).


Then add the cooked lentils(dal) to the mixture. Let it cook till everything comes to a light bubbly consistency.


In a separate pan, add all the seasoning ingredients with oil and let it fry till mustard seeds start crackling.


Add these seasonings to the molaguttal curry.


Serve hot or at room temperature with brown/white rice, rotis, parathas and so on. You could also store this for upto a week in the refrigerator.


Note: all ethnic ingredients available at Asian/Indian grocery stores.

Thursday, February 18, 2010

10 minute Wonder Series: Nutty - Minty Dip / Chutney

Nuts have always been a part of my daily cooking and food regimen since I can remember...but recently my hubby and I decided to cut out as many super-refined and over-processed foods from our family's diet as it was practically possible to...especially with the kids and their need for after-school snacks. In the past, it was always so easy to grab some store-bought goodies for their snack items...but we finally decided enough was enough.

Now we try to replace all those over-processed foods with simple, nutritious yet tasty snacks like nuts, for one thing. Then there is the cheese, the fruits, dried fruits and so on, that we are trying to incorporate as well. But that is the subject for yet another post.


And believe me, we are seeing the benefits of that substitution atleast in my husband's and my case...since we feel much more full with just a handful of nuts and of course, we still do have our indulgences in the store-bought desserts and so on, once in a while. But this change makes us feel very much better about our diet and the kids' diets as well. The kids surprisingly dont seem to mind the absence of store-bought snacks(especially if I keep showering them with home-made snacks that they demand:))

Nuts, I understand(as I read more and more) have a world of goodness packed in them...considering that they are chock-full of protein, omega - 3 essential fatty acids, antioxidants and Vitamin E and Vitamin B complex. And of course, I cant even begin to list all the heart-healthy minerals that they contain...potassium, magnesium and zinc being just a few.

So, with all that said, I try to incorporate nuts in every kind of dish...what is not to like - they make every dish creamy and melt - in - your mouth!

Here is a Nutty - Minty Dip that I make very often, not only because it is ready in less than 10 minutes but also because it is extremely versatile...great for sandwich spreads, dip for savory cookies / crackers and also a wonderful accompaniment for Indian tiffin items like idli, dosa and even rotis.


Here is the recipe:

Nutty Minty Dip / Chutney / Spread
______________________________
Serves: 4
Prep/cook time: 10 minutes

Ingredients:
Cilantro - 1 bunch
Mint - few leaves (5 or 6 or more if you can handle the strong taste)
Ginger - small piece (less than 1 inch size)
Garlic - 2 pods (roast slightly with very little or no oil)
White Sesame Seeds(Til) - 1tsp roasted slightly
Almonds - 8 to 10 roasted slightly
Green chilly peppers - 4 or 5( I used the long, thin Indian variety though any variety should work fine)
For seasoning: mustard(rai) and urud dal(split black gram), few curry leaves, 1 tsp light olive oil or any other cooking oil
Salt according to taste
Lemon juice for garnish

Method:

Clean and cut cilantro leaves.

Blend all the ingredients into a fine paste.

In a pan, add 1tsp oil and when it heats up, add the mustard and urud and curry leaves...wait till mustard starts to crackle and urud turns golden brown. Add these seasonings to the chutney. Top with some freshly squeezed lemon juice...yummmmy!!!

NOTE: All ethnic ingredients are easily available at most grocery stores in the Asian/Asian Indian aisle.

Wednesday, February 17, 2010

Masala Tindora Gravy / Kovakkai Gravy / Ivy Gourd Gravy


I am back again with another post for a favorite veggie gravy dish...creamy yet spicy and tangy tindora or kovakkai(ivy gourd gravy).

Back in my childhood days, Tindora was not one of my favorite veggies...back then I mostly liked potatoes
or okra or sometimes, a well-fried(ouch!!) eggplant dish. Now however, tindora is one of my many favorites in the veggie world.

I like this gravy dish almost as much as all the varieties of tindora (kovakkai stir-fries) that I make.

Masala Tindora Gravy Recipe:
*************************
Serves: 3 or 4
Prep/cooking time: 20-2 mins.

Ingredients:
********
Tindora/kovakkai/tinda/ivy gourd - 1 lb cut into 1 inch long pieces or round slices(according to your liking - both have worked fine for me)
Onion - 1 big cut into big chunks
Green chillies - 3 or 4 cut into thin slices
Tomato paste - 1 tbsp or tomato puree - 1/2 cup
Fresh yoghurt - 1 cup (whisk it lightly to remove any lumps and keep aside)
Cashewnuts - 7 or 8 chopped
Peanuts - 1 tbsp
Poppy seeds(khus-khus) - 1tsp
Garam Masala powder - 1/2 tsp
Dhania powder - 2 tsp
Cummin or jeera powder - 1/2 tsp
Paprika or red chilli powder - 1/2 to 1 tsp
Sugar - 1/2 tsp(optional)
Salt - according to taste
Turmeric - a pinch
Oil - 3 to 4 tbsp
For seasoning: Fennel seeds(saunf) - 1 tsp, fenugreek seeds(methi seeds) - 1/2 tsp
For garnish: Cilantro and/or tomato slices 

Method:
******
In a pan, add 1 to 2 tbsp of oil and add cut tindora and let cook till almost done (until the veggies become tender and almost cooked) which takes about 6 to 7 minutes. Keep aside.

In a separate pan, add a little oil(less than a tsp) and roast the cut onion, cashewnuts, peanuts and poppy seeds till the nuts turn brownish in color and the onions become slightly translucent. Let cool for a few minutes and grind into a smooth paste.

In a pan, add the remaining oil and then the fennel seeds and fenugreek seeds until the fennel seeds start crackling. Then, add the sliced green chillies and ground onion-nuts paste, turmeric, salt  and sugar(optional)and let the mixture cook for about 2 or 3 minutes until any raw smell in the onions disappears.

Then add the tomato paste or puree and let it boil together with the onion gravy.

Then add the cooked tindora and also all the spice powders(coriander powder, cummin powder, red chilli powder, garam masala powder) and let everything come to a boil.

Finally add the whisked yoghurt to the veggies and let it bubble up once before  taking off the heat and adding the items for garnish...which could be cilantro(coriander leaves) or sliced tomatoes or both.

This gravy dish would be a great accompaniment to rotis, bread, puris or even rice.

Note: All Asian / Indian ingredients and spices are available at most ethnic/Asian or Asian Indian grocery stores.

Monday, February 15, 2010

An Ode to Unique Indian Snack Foods

After a restful Valentine's Day weekend(of course, packed with great food) here I am back with a new post that pays homage to unique Indian snacks... specifically a wonderful savory snack...I am refering to Khasta Kachori.

This is a very interesting savory snack item but I had never tried it before at home...though I must have eaten it a million times during school days at the many chaat centers in Calcutta and then, later during college days.

I finally had a chance to make it as part of January's challenge at the Indian Cooking Challenge hosted by the wonderful Srivalli of Spice your life(Thanks, Srivalli! for giving me a chance to relive wonderful old memories of times spent with college friends eating at chaat centers back home).

This recipe is a tried and tested recipe perfected by Medhaa of Cook with Love...Thanks, Medhaa for taking the time to try and perfect this recipe for all of us in ICC.

I tried the moong dal kachori since that is the closest reminder to me of all the kachoris I have eaten at chaat centers.

Now, coming to the recipe...here I have mentioned three different types of filling: onion, split peas and moong dal. I am also glad I followed all the recipe instructions to the letter because then I was able to avoid common pitfalls, like having the kachoris turn out flat like puris and so on.

 Hope all my readers will try this recipe some time since the finished product is so delectable...it is really worth the effort!!!

When I was looking up some info on Google about Khasta Kachori, I found the rolled out pastry shape of kachoris as well as round - shaped ones...so I made both of these...of  course, the ingredients were the same for both varieties...needless to say, everyone at home enjoyed both varieties of these!!!


Khasta Kachoris Recipe:
--------------------------------
Resting Time for the Dough is app 1/2 hr - 1 hr

Frying time for the Kachoris - 20 mins for each batch app.
Soaking Time for the Filling is app. 1 hr
Cooking Time for the Filling is app 15 mins
Yields - 15


For the Dough-
Ingredients Needed:
--------------------
All purpose flour / Maida - 2 cups
Oil/ Ghee - 1/4 cup ,
Salt - 1/2 tsp
Water for kneading

Method:
Mix the flour and salt, Add the oil/ghee and mix till you get a bread crumbs texture.
Slowly add water and make a soft dough. Knead well for about 8 minutes.
Cover and keep aside to rest for atleast half hour.

Special Tips / Notes for the dough:
Keep the dough covered at all times, if not it will dry up and not puff up when frying. If the dough is made right wet cloth can be used if not just a towel.
The dough could spring back for many reasons:
Dough is too cold (If wet cloth is used)
Dough is not soft enough.
Not kneaded for enough time.
Oil is less.
Not rested enough.

Fillings :
--------
Khasta Kachori - Moong Dal Kachori
Ingredients Needed:
Split Moong Dal (yellow) - 1/2 cup
Cumin Seeds - 1 tsp
Hing / Asafoetida - a pinch
Curry Leaves - 2 tsp chopped fine (opt)
Green Chilli - Ginger paste - 1 tsp
Sauf / Fennel seeds powder - 1 tsp
Garam Masala - 1/2 tsp
Red Chilli powder - 1/2 tsp
Mango powder / Amchur - 1 tsp
Oil - 1 tsp
Salt to taste

Method-
1. Wask and Soak dal in water for atleast 1 hour. You can go upto 4 hours not more.
2. Drain the water well.
3. Grind the dal to a coarsely. (Will resemble Idli Rawa)
4. Heat oil in a pan.
5. Add the hing and cumin seeds.
6. Once the seeds splutter add the curry leaves.
7. Add the dal.
8. Lower the heat and keep stirring for 5 minutes till the dal stops sticking to the pan.
9. Cook for another 10 minutes on low till the dal turns slightly brown.
10. Add all the masalas.
11. Cook for few minutes till the aroma of the spices hit you.
12. Add Salt.
13. Remove from heat and keep aside to cool.


Special Tips / Notes for the filling:
The fillings have to be really dry if not when rolling they will ooze out when rolling.
Adjust the masalas according to your taste. What is given in this recipe is spicy to the extent one can still enjoy.
For idea on pressing the filled kachori, check out Manjula's method. If you try to press out using a rolling pin, the filling may come out and make holes in the kachori.
Fry the kachori's on medium low to get a crisp outer layer, that is the key. For people using electric stove, the numbers can be going from 6 to 4.


Muttar Ki Kachori from Tarla Dalal:
For green pea filling
2 cups green peas
1 teaspoon green chillies, chopped
1 teaspoon ginger, grated
1/2 teaspoon nigella seeds (kalonji)
2 teaspoons fennel seeds (saunf)
2 bay leaves
1 teaspoon chilli powder
1 teaspoon garam masala
4 tablespoons chopped coriander
2 tablespoons oil
salt

For the green pea filling
Coarsely grind the green peas,green chillies and ginger in a blender without using any water. Keep aside.
Heat the oil in a pan,add the nigella seeds,fennel seeds,bay leaves and ground green pea mixture and saute over a very slow flame for 8 to 10 minutes.
Add the chilli powder,garam masala,coriander and salt and saute for 2 more minutes. Remove the bay leaves and discard. Divide into 12 equal portions.

Pyaz Ki Kachori:
For the onion filling
2 cups onions, finely chopped
1 teaspoon nigella seeds (kalonji)
2 teaspoons fennel seeds (saunf)
2 bay leaves
1½ teaspoons green chillies, finely chopped
2 tablespoons Bengal gram flour (besan)
2 teaspoons coriander (dhania) powder
2 teaspoons chilli powder
1 teaspoon garam masala
3 tablespoons chopped coriander
2 tablespoons oil
salt to taste

To make the onion filling-
Heat the oil in a pan. Add the nigella seeds, fennel seeds, bay leaves, green chillies and onions and sauté till the onions turn light brown in colour.
Add the gram flour, coriander powder, chilli powder, garam masala and salt and sauté for 2 to 3 minutes.
Add the chopped coriander and mix well. Remove the bay leaves and discard. Allow the mixture to cool completely.
Divide into 12 equal portions and keep aside.

To Make Kachori's:
--------------------
Make a small ball from the dough. Roll out into a 2 inch diameter circle. Or flatten the ball using your fingers having the center thick and sides little thin.
Place about 1.5 tsp of the filling in the center of the rolled dough.
Cover the filling with the dough by slowly stretching it over the filling. Seal the ends and remove excess dough. Repeat with all the balls and keep aside for 5 -7 mins.
Then using your palm, flatten the balls by lightly pressing it, as using the rolling pin will make the filling come out. (See notes below). Keep aside covered. Repeat with the remaining dough.
Meanwhile heat some oil for deep frying. The oil should not become smoking hot. Test to see if the temperature is right by dropping a tiny ball of dough and see if it is rising slowly to the top.
Drop the kachoris in batches of 3-4 gently into the oil. It should rise up slowly. If you don't want to use lot of oil, use just enough for two or three at a time and fry them.
After it rises up (about 2 minutes), turn it over.
Cook for about 6 to 10 minutes till the side down gets a golden brown color.
Turn and cook the other side for another 6 minutes or till its golden brown in color.
Remove when done, cool and store in airtight container.
Serve with coriander chutney and tamarind chutney


Special Tips / Notes for making the Kachoris:
You can fry 3 kachori's at a time.
The oil should be at a heat when you drop some dough it should come up slowly, if the dough comes up too fast the oil is too hot, if it does not come up then the oil is cold.
It will not be crisp if the oil is too hot.

Enjoy!!!

Awards Time!!!

After a restful Valentine's Day weekend(of course, packed with great food) here I am back with a new post relating to the beautiful awards that I have received from my blogosphere friend, Jyothi of Veggie Hut.

Rules for accepting these awards:


1. Thank the person who presented you with this award.
2. Pass it on to one or many blogger friends.

Jyothi, Thanks a million for these beautiful awards!!! Your friendly gesture means a lot to me!!!


I am extremely happy to now pass on these awards to these awesome blogger friends: Priya, Ramya, Nisha and Subhashini.

Well, would you like to know how I celebrated these awards...I made this awesome savory snack for which the recipe will come soon...in fact, in a few hours:))

Friday, February 12, 2010

Chocolatey Goodness for Valentine's Day - Healthfully Decadent Style!!!


With Valentine's Day around the corner, I wanted to make some chocolatey goodies for the occasion, but in the Healthfully Decadent style. I wanted to make something wholesome and yet not over-the-top when it comes to fat and calories...most of the recipes I found on the web called for oodles of Nutella(the chocolate-hazelnut spread) and butter.

So I decided to make up my own recipe...so that I would come up with a product that would be yummy but still low on fat...something  I would not feel guilty about feeding the kids and of course, could eat one or two(or three or four...??) myself.

This is the recipe I came up with by combining multiple recipes for chocolate chip cookies and peanut butter cookies. There is no peanut butter in this recipe, but I was looking at those recipes for guidance because peanut butter is about the same consistency as Nutella.

The end result, I am happy to say, is that one I shall be making many more times. It is not too sugary-sweet but at the same time, it is one divine cookie with a lot of chocolatey wholesomeness. Here is the recipe, in case somebody else would like to try it. This recipe makes you "Super-Mom" with the kids, for sure...and you can tell yourself that the health benefits of high anti-oxidants from the dark chocolate make it good for you too:)))


Valentine's Day Special:  Heart-shaped Nutella Cookies encrusted with Nuts and Chocolate Chips Recipe
********************************************************************************

Makes: 15 cookies
Prep Time: 15 mins
Cook Time: 12 - 14 mins

Ingredients:


1/4 cup (comes to about 4tbsp) light olive oil or any vegetable oil (alternately, you could use butter, of course...I used olive oil for a lighter, low fat cookie version)

1 ounce unsweetened dark cocoa powder( I used Ghirardelli)

3/4 cup granulated sugar

1 cup all-purpose flour

1/2 teaspoon baking soda

1/2 teaspoon salt

5 tbsp Nutella

1 large egg

1 teaspoon vanilla extract

1/2 cup coarsely chopped hazelnuts or walnuts, toasted

1/4 cup white chocolate chips


Directions:

Preheat oven to 350 degrees F. Grease cookie sheets or I just put parchment paper on the baking sheet to avoid the use of butter or oil for greasing the sheet(healthfully decadent, you know!) .


Whisk together cocoa and olive oil(or melted butter) until nicely combined. Place sugar in a large mixing bowl; add oil(butter)-cocoa mixture, and beat using a mixer on medium speed, until well combined and grainy - about 1 to 2 minutes.


In a medium mixing bowl, sift together flour, baking soda and salt. Separately, beat Nutella, 1 egg and vanilla into sugar-oil-cocoa mixture, until well combined, about 1-2 minutes. Reduce mixer speed to low and beat in flour mixture until just combined; stir in hazelnuts/walnuts  and chocolate chips until combined.


Roll tablespoons of dough into balls, place on cookie sheets, and flatten slightly using palms of hands to get round cookies. I used some heart - shaped cookie cutters to shape the cookies. Bake for 12-14 minutes, or until set but not too hard. Cool 2 minutes before transferring to wire racks to cool completely. Enjoy!


These Healthfully Decadent Nutella Cookies go to Priya of Easy N Tasty Recipes for her timely event "Hearts for St.Valentine's Day".


Happy Valentine's Day to all!!!


Thursday, February 11, 2010

International Flavors Series # 1 - Penne Pasta and Asparagus with Tangy Spinach Sauce


After talking about dry topics like Technorati and Technorati rankings for bloggers, I have now decided to go back to my original interest - food blogging. So, here is an easy-fix pasta recipe that gets even my picky kids to eat spinach because the recipe involves 'pasta' and 'cheese' - two items I find most kids love (not to mention, the adults also dont hesitate to dig in) 

Penne Pasta and Asparagus with Tangy Spinach Sauce Recipe:

Serves: 4
Prep/cook time: 20 - 25 minutes

Ingredients:

Penne Pasta(I used Penne, but in the past, I have used macaroni and even fettucini in this recipe in place of Penne) - 1/2 box, normally about 150 to 200gms or 8 oz
Spinach - 1 bunch, chopped
Asparagus - 5 or 6 spears cut in 1 inch long pieces
Garlic - 3 or 4 pods, chopped up
Cilantro and/or mint - few leaves
Basil leaves(optional) - 3 or 4
Almonds or walnuts or a combination of both - 6 or 7 nuts
Lemon juice - 3 or 4 tsp
Parmesan cheese - 1/2 cup grated( mozarella cheese also tastes great in this recipe)
For Seasoning: Salt and Black Pepper

Method:

Add the pasta to a pot of  boiling water(seasoned with salt) and let cook for 6 - 7 minutes or according to pasta's package directions. Drain the water and set the pasta aside.

Simultaneously, you could also cook the asparagus for 5 - 6 minutes in boiling water and then, take off the heat and drain (make sure that you dont overcook asparagus or otherwise it loses the bright green color)

In a blender, puree the spinach, cilantro and/or mint, garlic, almonds(or walnuts), lemon juice well till you have a fine paste.

In a pan, add some light olive oil(or any light vegetable oil). When it starts to heat up, add the spinach puree and let it cook for 5 - 6 minutes.

Then, add the cooked pasta and asparagus to the puree.

Add the seasonings(salt amd pepper) and finally, add the grated cheese on top for garnish.

Note: Alternately, if you would like to add a creamier texture to the pasta, you could make a white sauce* and pour on top of the pasta and then add cheese before serving.

White sauce recipe:

In a pan, add a couple of teaspoons of butter and when it starts melting, add 1 tbsp of all-purpose flour and stir well. When the flour thickens up and starts to turn brown, immediately you could pour a cup of milk or cream to the butter-flour mixture and then keep stirring to prevent lumps till the sauce thickens - at which point you can add it to the pasta.

Wednesday, February 10, 2010

Follow-up to Musings on Technorati Claim Procedure

So I thought my previous post would be my one and only post on Technorati but I guess I am not the only one to whom all  this is unknown and intriguing.

So here goes, everything I know about Technorati:

Technorati is a search engine that offers a listing of top 100 - ranked blogs. It offers every blogger an opportunity to create an account on the technorati website and join their blog directory.

Since they have a very comprehensive directory, it apparently helps to sign up for the free account on their homepage. Also, once your blog is on their directory, it becomes possible for your blog to come up on searches in their search engine. Then your blog shows up with your relative ranking as compared to the rest in that category.

First, you create your free profile which is just a short process of creating a username and password for yourself. Then you receive an email from Technorati asking you to verify your email address and confirming that your profile has been created. Once you login to your new account, you get a chance to enter your blog's name and url on the account in the spaces provided. Then, you also click a button to start "claiming" your blog - which means that their search engine needs to confirm you are the actual owner of the blog you are claiming. Then, you again get an email with your unique claim code and you do what I did in the previous post, that is, you paste that unique claim code in a blog post.

Then, after you have done that, you get yet another email to say that their search engine has successfully crawled your blog and found your claim code. All the process uptil here can take place in a day, because the emails from technorati are auto-generated. This is the part of the process I am at, right now. But I understand from other bloggers that it takes a few weeks after this step for your blog to start  actually showing up in their searches.

Hope all this makes sense to my readers and more than that, hope this is useful!!!

You can also check Wikipedia's page on Technorati for additional information.

Tuesday, February 9, 2010

Making your Blog Count - Random Musings, Technorati et al

My Technorati Claim Code:  MDQJ9NKWXARU

I would rather be blogging about food or any other topic under the sun...but, in the short time that I have been a resident of blogosphere, I have realised that there are many mundane things a blogger must first take care of, before settling down to blog in peace about the topic of their choice.

One such detail that I am taking care of today, is the Technorati claim code which will help a blog in the following ways:

a)Improved Search traffic
b)Improved Directory Traffic and ranking among top 100 blogs(long ways to go there:))
c)Expanded readership, visibility

So, there you have the reason for the mystical code at the beginning of the post!

Hope this helps somebody out there, who doesnt know about Technorati(though I doubt it, I am probably the last person to find out!!!)

Sunday, February 7, 2010

Comfort Foods Series #2 - Winter Delight Clear Orange Soup


I seem to be in a soup mode, currently...this is my second posting for a soup recipe in the last week. However, there is a reason to this (soup)obsession. We have been seeing a steady stretch of rains here in the Bay Area for the last couple of weeks. Nothing like "snowmageddon" in the East Coast, of course and our East Coast friends envy us Californians for that. But, be that as it may be...we still get some chilly 40 degree evenings:)) and that makes us turn to soups for our evening meal.

The inspiration for this soup comes from a friend who served it as an appetiser, that was much appreciated by all at a dinner she hosted. The cook  time is less than 10 minutes and the only real prep work is to juice the oranges needed for the soup. Of course, the key lies in choosing the oranges that yield the maximum amount of juice. For this, the tip I have found useful for selecting juicy varieties is that the thicker the skin, the more juice it yields and also, the stronger the scent that it has, the greater the quantity of juice yielded. Here in California, I have used both the Navel Oranges and Valencia Oranges with equal success for this recipe.

This soup I have here, is not a one-pot meal like most other soups I  make - lentils soups or veggie soups or pasta soups...it is actually more of a warm appetiser, perrrrfect for a chilly evening...so here is wishing warm and toasty evenings for our friends in colder climes.


This soup recipe goes to the Healthy Inspirations Event - Soups  hosted by Usha of  Veg Inspirations.


Recipe for Winter Delight Clear Orange Soup:
***********************************


Serves - 4
Prep time - 10 minutes
Cook time - 7 to 10 minutes


Ingredients:


Oranges - 8 to 10 (I have used both the Valencia and Navel Orange varieties with equal success for the quantity of juice)
Cummin(jeera) powder - 1tsp
Green chillies - 2 (cut in small pieces or slit in half, according to taste)
For seasoning: salt, black pepper,  cummin seeds(jeera) - 1tsp, cilantro(coriander) leaves, ghee(clarified butter) - 1tsp, sugar(optional)


Method:


Extract juice from the oranges(some pulp is okay in the recipe) and keep aside.


In a pan, add the ghee(clarified butter) and when it is heated, add the green chillies, cummin seeds and all the seasonings except cilantro(coriander leaves).


When the cummin seeds start to crackle, add the freshly squeezed orange juice.


Let the mixture boil for a few minutes till the soup starts to foam, just for 5 minutes or so.


Once the raw smell of the juice disappears, take the pan off the heat(do not overboil, since the soup may then turn bitter).


If the juice of the oranges is not very sweet, a little sugar would help.


Once off the heat, add the cilantro(coriander) leaves for garnish.


Serve piping hot.


This recipe is an easy - fix and the many health benefits of oranges( like the fact that they are loaded with Vitamin C - 116% DV, dietary fiber, folate and Vitamin B) are an added bonus, I guess.
Related Posts with Thumbnails