Showing posts with label 10 minute recipe. Show all posts

Monday, May 17, 2010

MANGO MADNESS, AN ANNOUNCEMENT AND MORRRRE AWARDS!!!

So I am back with an announcement, which is, that I need the help of my fellow bloggers!! I will not be able to feed my blog with regular posts for the next month or so...(courtesy...a financial analysis exam that is approaching at breakneck speed and I will find it difficult to find time to devote to my beloved blog) That is where, I hope my fellow bloggers will step in to save my blog for the next month...I would like to request my friendly neighborhood bloggers to help me feed my blog with their valuable guest - posts...so I will be approaching you all with requests for precious inputs in the form of guest-blog posts while I am away with my nose buried between huge volumes on finance!

Now that announcement is done, here is another recipe for a delicious dessert bar, sweetened by the use of delectable mango pulp...I have been scouring the web looking for good recipes for this kind of Kalakhand...I saw some good recipes for quick-prep kalakhand on vahrevah.com and even on some wonderful food blogs I regularly  read like Priya's Easy n Tasty Recipes...I tweaked these recipes according to my liking, used evaporated milk and almond meal in place of ricotta cheese and added some mango pulp and I am posting that recipe below. The most wonderful part of this recipe is that, it is ready in  about 10 minutes including prep-time...Yay!!! Truly wonderful (and light???) dessert!!
Recipe for Quick N Easy Mango Dessert Bar(Mango kalakhand)
Prep/cook time: 10 minutes
Servings: 15 to 18 pieces according to size of bar
Ingredients:
1 cup mango pulp
1 cup evaporated milk(low-fat)
1 cup non-fat milk powder
1/2 cup almond meal(almonds ground into cornmeal consistency)
few saffron strands
1 tsp cardamom powder
few slices of pistachio/almonds for garnish

Method:
Spray a microwaveable wide dish with cooking spray(to prevent the mixture from sticking) and add all the ingredients one-by-one to the dish(except for nuts which are for final garnish)...mix well till combined. The mixture should be semi-solid, if it seems to liquidy(if that is a word!), you can either add more almond flour or milk powder.

Microwave on medium-high or high power for 2 minutes initially and then take out of the microwave and stir...place the dish back in the microwave and microwave for 2 minute intervals...it took a total of 8 to 10 minutes in my microwave.

When the mixture starts to firm up and becomes puffy towards the center of the bowl...add the nuts for garnish and set aside till the dessert looks firm enough to cut into pieces and serve(takes a few minutes at room temperature)
Serve warm or chilled or at room temperature...by itself or with a little vanilla icecream on the side...heavenly!!!

I would like to leave you with some more Awards that I recently received from my fantastic blogger friends...Thanks, Nithu for the Tag Award! Thanks, Cool Lassie for the Honest Scrap Award!!! Thanks to the wonderful team from Yummy-O-Yummy, Nayna of Simply.Food, Jyoti of PanchPakwan for the Sunshine Award!
I would like to offer these awards to all my blogger friends...please feel free to accept these awards!
                                                     

Also, here are pictures of five of my favorite posts...which I am posting as per the rules of the awards I received previously!


Tuesday, April 6, 2010

10 minute recipe - Indian Style Pancake

Hope all my readers had a great weekend...wonder how many folks got an Apple Ipad...I didnt!!! But then, I am technologically - challenged...dont even use my cell phone to its fullest potential...sigh!!! And I dont even want to move out of the dark ages into the more technologically advanced world of today:)) I am sorry that I cannot understand all the excitement behind every new and cool gadget...I do buy gadgets...but only if I can justify to myself that it will add value to my life...thankfully the kids are not old enough to get all hyped-up about every new tech invention...I have a few more years of peace:)) Of course, I do get excited when Apple's stock price moves...while others probably dont understand my level of excitement there...

Anyways, that, I promise is my only random, bears-no-connection-to-anything-whatsoever thought of the day...and here is a recipe for a really quick 10-minute (South)Indian style pancake...it is a variation of the vella dosai that is commonly prepared in south-indian homes...my mom would make it often when I was a kid and it was a wonderful snack/breakfast that I looked forward to, even in those days, filled with strong likes and dislikes when it came to food...I continue to like it even today and luckily for me, the kids like it too...so I do make it at home quite often.

This south-indian style pancake goes to the Pancakes event over at Priya's Easy n Tasty Recipes...also sending it to Priya's CWS - Cardamom seeds event...

Recipe for South Indian Pancakes(jaggery dosa):
Serves: 7 to 8 pancakes(depending on size)
Prep/cook time: 10 minutes

Ingredients-
Whole wheat flour - 1 1/2 cups
Semolina/cream of wheat/rava - 1/4 cup
Jaggery - 3/4 cup crushed(could also use cane sugar)
Cardamom - 1tsp powdered
Cooking oil(or clarified butter aka ghee) - 1/2 tsp for each pancake
For topping(optional) - 1 banana sliced and roasted lightly in cooking oil or clarified butter/ghee

Method:
In a pan, add enough water to just submerge the crushed jaggery and then let the mixture come to a boil...will take 3 to 4 minutes on medium-high flame...set aside to cool.

In another mixing bowl, mix all the flours alongwith powdered cardamom...add the jaggery mixture and mix well to ensure there are no lumps in the batter.

Take a skillet and add a ladleful of batter to it...spread in circle (as prefered) and cook on a medium-high flame for a minute or two..and then flip the pancake with a spatula and cook until both sides are golden brown.

Serve with an optional topping of sliced bananas roasted(in oil/ghee) or as is.

Saturday, April 3, 2010

SPRING FEVER!!!!

Spring is in the air, the days are getting warmer....when I see all the signs of spring, I feel like celebrating the season. In fact, I would like to run through the grass, singing loudly...BUT STOP!! I am not like one of our Indian movie actresses, who celebrate the season thru song and dance, then I wonder what I can do to celebrate the season, that is practical...something that is practical and wont alarm my husband or make him think I am nuts:)))

Well, coming to the sensible ways to celebrate the season change, I have chosen to do some much-needed spring-cleaning in our house...some decluttering...lets see how far I progress with this noble intention...will keep you all updated. I also see the grocery stores filling up with seasonal fruits and vegs...fresh strawberries, pineapples, plums, peaches, corn...the variety is endless...well, the other practical way to take advantage of the changing seasons would be to use this lovely seasonal bounty in my dishes...so here is a light, refreshing springy dish my family and I enjoyed in the past few days...

The other way I decided to celebrate this season is to give my blog a light, springy template!
HAPPY EASTER TO ALL MY BLOGGER FRIENDS AND I WISH YOU A WONDERFUL SPRING TOO!!!
Recipe for light, fruity sundae:
Serves: 4
Prep/cook time: 7-10mins.

Ingredients:
Bananas - 2 cut finely
Pineapples - 1 cut finely
Plums and/or peaches - 3 cut in thin, round slices
Honey - 2 tbsp
Vanilla - 1 tsp
Dates - 1/2 cup sliced
Vanilla yoghurt (or vanilla icecream) - 2 cups
Milk - low fat - 1/4 cup

Method:
In a blender, puree cut bananas, pineapples, honey, vanilla and milk finely until you get a smooth sauce-like consistency.

In a serving glass,  arrange the sliced plums and/or peaches in a single layer at the bottom. Then, over that, spoon a layer of the icecream and then, a layer of the fruit puree.

Keep alternating couple more layers of the sliced fruit, icecream and  fruit puree.

Finally, garnish the top of the sundae with sliced dates.

Additionally, for a sweeter finish, you could drizzle some caramel sauce on top.

Sunday, March 21, 2010

Small Wonders Series and Reposting for Event

After a hectic weekend filled with activities for the kids, I felt I needed to unwind by posting something(even if it was a repost) and do some bloghopping...my daughter also wanted me to post a Rangoli(also known as Kolam or Alpana) that was her entry for an exhibition at a temple here in the Bay Area this weekend...She was of course very excited to send in the entry(but then there is very little she doesnt get excited about) and even more excited when she got a certificate and plaque for sending in her entry...she was walking on cloud nine the whole of yesterday imagining herself as the next Picasso:))) So here it is, the medium that she  used for the Rangoli was lentils, colored powder/Rangoli powder and glitter powder:


Repost for Usha's Healthy Inspirations Event - Salads:

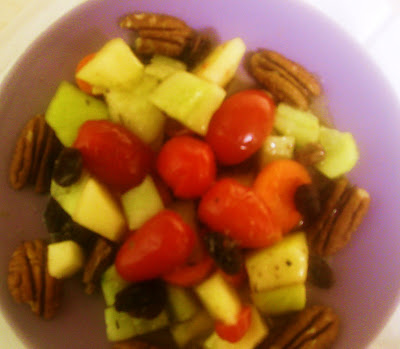
My first entry is a Recipe for Vibrant Mixed Fruit and Veggie Salad...this salad is not only colorful with varied flavors from fruits, vegs, nuts and dryfruits...it also packs a healthy punch of anti-oxidants and is ready in under 10 minutes...a great accompaniment to breads, pastas, rotis and even great as a snack by itself!!!


My second entry for the same event:  Easy Tangy Green Beans Salad with a crunch.
This is another 10 minute recipe and very versatile as a side-dish or salad...could be served warm or cold.

Saturday, March 6, 2010

Another Award + Fruity Yoghurt Side Dish

My fantabulous blogger friend who blogs @ Joy of Cooking...Jagruti has bestowed this Tag Award upon me...She is a wonderful blogger who has an eye-catching blog and equally eye-catching recipes...not only Indian but also from different corners of the world...Thanks, Jagruti for this Tag award...awesome of you to think about me!

This award comes with certain rules...the first rule being that you link and mention the person that tagged you(Jagruti, how can I forget you?)...secondly, I need to pass it on to seven blogger friends...so I have chosen seven blogger friends randomly by picking names after assigning consecutive numbers to my blogger pals' names and asking my family to pick seven random numbers. The toughest part always is to pick just a certain number of blogger friends to tag. So here goes:

Rachana of Veggie Fare
Shahana of Me N My Apron
Daisy Blue of  Spicy Lounge
Love2cook of Love2cook-msia

Thank you for your awesome support and hope you enjoy these awards, my friends!

As part of the rules for accepting this award, I am also required to post one or more of my favorite pictures...which I will post next week...

****************************************

Now, for today's Fruity Yoghurt Side Dish aka Fruity Raita with Dahi:

This is part of my ongoing effort to incorporate as many fruits and vegs. as possible into my family's daily diet...I always find that whenever we buy fruits, most of them tend to sit on the counter...isnt it funny how kids never reach for a fruit when it comes to snack-time...it is always the fried or sugary food that holds their attention. So now I sneak fruits just as much as vegs. into almost every meal.

This fruity yoghurt side dish or raita would be a great accompaniment to rotis, rice dishes or even as a sandwich-stuffer. The best part about this is that you can pack in multiple daily servings of fruits and vegs into one super-simple dish.

Recipe for Fruity Yoghurt Side Dish or Raita:

Serves:4
Prep/Cook Time: 10 minutes

Ingredients:
Pears - 2 ripe but of crisp variety(like the Asian Pears), grated finely
Carrot - 1 grated finely
Cucumber - 1 seedless or de-seeded and grated finely
Tomato - 1 cut finely
Red Onion - 1 cut finely(optional - I have made these fruity yoghurt raitas with and without the onion)
Green chilli pepper - cut finely or slit in half
Yoghurt - 1 1/2 cups ( I like the thick Greek yoghurt variety - lowfat or nonfat for this dish but any variety should work good)
For seasoning: salt, pepper and cilantro

In a bowl, add all the ingredients and top with seasonings and mix well till well-combined.
Serve chilled or at room temp.

Asian Pear on FoodistaAsian Pear

Monday, March 1, 2010

Yummies from Blogosphere: A sweet start to a new series!

As I mentioned in my post last week to my readers, here is my new series: Yummies from Blogosphere - where I am delighted to showcase beautiful recipes from Bloggerworld which I have tried and relished with my family and friends. I feel that this is the best way that I could show appreciation for all the inspiration that I get from my fellow bloggers.

I have bookmarked wonderful food creations from almost every food blog I read regularly...so, naturally I had a humongous variety of dishes to choose from, to try out last weekend...I did not know which one to choose because they are all foods to die for!  I wanted to start this new series with something sweet... I could not believe that I had bookmarked so many recipes!

I just could not fix on one recipe to try out. Finally, I ended up making a serially numbered list of favorite sweet recipes (one from each of the blogs that I regularly read) and had my daughter give me a random number and tried out the recipe corresponding to that number. It just goes to show what amazing talent we have in Blogosphere, I think.

Without further ado, let me go on to the recipe that I tried last weekend...

It was a wonderfully sweet recipe for Microwave Cashewnut (Kaju)Peda originally posted by Priya of  Priya's Easy n Tasty Recipes. I will provide a link to the original recipe below. It was posted almost a year back by Priya. She has provided some great info on cashewnuts - their nutritional benefits and method of storage and so on...what attracted me to this recipe was the fact that it is probably one of the quickest and fastest sweet/dessert recipes that I have made in a while, not to mention the fact that is also extremely healthy... I started making it with 10 minutes to spare for dinner time and it was still ready, well in time to have as a tasty, bite-size dessert. The pedas were easy to shape into round discs(actually my 9 year old daughter helped me with this step...it was easy enough to shape for her!)

NOTES AND POSSIBLE VARIATIONS:  I followed the original recipe as much as possible. The only change I made to the original recipe is that, I ended up using 4 tbsp of water in place of the original recipe (which required 2 tsp water) That was mainly because I used totally non-fat milk powder which was very crumbly and needed some extra water for the cashew and milk powder mixture to come together. I also used some raisins as well as pistachios for the garnish. Plus, I was thinking it might be good to use some saffron strands the next time I make this for an extra touch of flavor...talk about icing on an already beautiful cake!

The taste of course, was unbelievable inspite of the fact that it is almost totally devoid of butter/oil. Needless to say, my family loved it  - even my toddler!


Thanks, Priya for this fabulous recipe!
 I so love this series...I(and of course, my family!!!) cant wait to try the next Yummy from Blogosphere!


Recipe for Microwave Kaju Peda(as posted on Priya's Easy n Tasty Recipes):
-------------------------------------------------------------------------------
1cup Cashew powder
1/2cup Milk powder
2tsp Water
3/4cup Sugar
Few pistachios (garnishing)


Take a wide microwave bowl...add the cashew powder, milk powder, water and sugar together and mix with a spatula, microwave for 2 minutes in high, stir in between..Keep aside and let it cool..


Now it will look like soft chappathi dough, roll or shape them as u desire..Garnish the pistachio..

Tuesday, February 23, 2010

10 Minute Recipe Series:Vibrant Mixed Salad with a healthy punch of anti-oxidants

Whenever I add a salad to our meal, I try to make it as colorful as possible...you know, so the kids will atleast let me put it on their plates because they like the colors...once it gets on their plates, of course, chances are it has some hope of making it to their tummies!!! Otherwise, it is "Can I have something else to eat?" and of course, the other high feature on the list of complaints about food being - "This doesnt look cool." Then, I launch into the usual lecture about how we could not open our mouths to do anything except eat when we were at the dining table as kids...sigh!

Of course, the more colorful the salad is, the greater nutritional punch it can pack - from a variety of veggies and fruits. Yes, I like to combine veggies and fruits in salads...not just because of the colors, but also because it is so tough to get kids to eat both...so any help one gets from combining them, the better.

Of course, when I am starting to mix things up with fruits and veggies...I dont stop there...I also sneak in some dry fruits and nuts for the anti-oxidant punch!!!

Also, here I like to use a simple salad dressing combining lemon juice and honey...which is great because I understand that one of the health benefits of honey is in regards to how it can help people lose weight. Believe it or not, by combining honey with lemon juice, the body can more easily digest the fat in various foods. And I can always use that benefit...another sigh!

The awesome thing is that, the flavors are so varied, it does not need any addition of cheese, croutons or any of the other flavor enhancers for salads!!!

This salad I have here is not only colorful...it also gets ready in under 10 minutes...a great accompaniment to breads, pastas, rotis and even great as a snack by itself!!!

Recipe for Vibrant Mixed Fruit and Veggie Salad:
------------------------------------------------------------------
Serves: 4
Prep/Cook Time: 10 minutes

Ingredients:
Carrots - 1/2 cup cut into thin slices
Grape Tomatoes - 1/2 cup sliced in half (or any other firm tomato variety cut into small chunks) 
Cucumber - 1/2 cup cut into small chunks or slices
Apples  and / or Pears - 1/2 cup cut into pieces(I used the variety Golden Delicious but any crisp yet juicy variety should be good)
Raisins - 1/2 cup seedless
Pecans / Walnuts - 1/4 cup cut into small pieces
Grapes(optional) - 1/2 cup(you could also do half raisins and half grapes or just omit the grapes altogether - both ways work fine)

For seasoning / salad dressing: Mix /whisk together all of the following and set aside -
Light olive oil - 1  tbsp
Lemon juice - 2 tbsp
Honey - 1 to 2 tbsp(depending on how sweet you like the salad to be)
Crushed Black Pepper - 1 tsp
Salt to taste

Method:
Add all the cut veggies. fruits, nuts and dry fruits together in a bowl.

Pour the seasonings / salad dressing on top of the salad.

Whoo Hoo!!!

Note: This salad is better when consumed immediately or within an hour or two of preparation, otherwise the apples start turning brown.

I wonder how my blogger friends add punch to their salads???!!!!


Thursday, February 18, 2010

10 minute Wonder Series: Nutty - Minty Dip / Chutney

Nuts have always been a part of my daily cooking and food regimen since I can remember...but recently my hubby and I decided to cut out as many super-refined and over-processed foods from our family's diet as it was practically possible to...especially with the kids and their need for after-school snacks. In the past, it was always so easy to grab some store-bought goodies for their snack items...but we finally decided enough was enough.

Now we try to replace all those over-processed foods with simple, nutritious yet tasty snacks like nuts, for one thing. Then there is the cheese, the fruits, dried fruits and so on, that we are trying to incorporate as well. But that is the subject for yet another post.


And believe me, we are seeing the benefits of that substitution atleast in my husband's and my case...since we feel much more full with just a handful of nuts and of course, we still do have our indulgences in the store-bought desserts and so on, once in a while. But this change makes us feel very much better about our diet and the kids' diets as well. The kids surprisingly dont seem to mind the absence of store-bought snacks(especially if I keep showering them with home-made snacks that they demand:))

Nuts, I understand(as I read more and more) have a world of goodness packed in them...considering that they are chock-full of protein, omega - 3 essential fatty acids, antioxidants and Vitamin E and Vitamin B complex. And of course, I cant even begin to list all the heart-healthy minerals that they contain...potassium, magnesium and zinc being just a few.

So, with all that said, I try to incorporate nuts in every kind of dish...what is not to like - they make every dish creamy and melt - in - your mouth!

Here is a Nutty - Minty Dip that I make very often, not only because it is ready in less than 10 minutes but also because it is extremely versatile...great for sandwich spreads, dip for savory cookies / crackers and also a wonderful accompaniment for Indian tiffin items like idli, dosa and even rotis.


Here is the recipe:

Nutty Minty Dip / Chutney / Spread
______________________________
Serves: 4
Prep/cook time: 10 minutes

Ingredients:
Cilantro - 1 bunch
Mint - few leaves (5 or 6 or more if you can handle the strong taste)
Ginger - small piece (less than 1 inch size)
Garlic - 2 pods (roast slightly with very little or no oil)
White Sesame Seeds(Til) - 1tsp roasted slightly
Almonds - 8 to 10 roasted slightly
Green chilly peppers - 4 or 5( I used the long, thin Indian variety though any variety should work fine)
For seasoning: mustard(rai) and urud dal(split black gram), few curry leaves, 1 tsp light olive oil or any other cooking oil
Salt according to taste
Lemon juice for garnish

Method:

Clean and cut cilantro leaves.

Blend all the ingredients into a fine paste.

In a pan, add 1tsp oil and when it heats up, add the mustard and urud and curry leaves...wait till mustard starts to crackle and urud turns golden brown. Add these seasonings to the chutney. Top with some freshly squeezed lemon juice...yummmmy!!!

NOTE: All ethnic ingredients are easily available at most grocery stores in the Asian/Asian Indian aisle.

Wednesday, February 3, 2010

Easy Side dish with Okra and yoghurt / vendakkai thayir pachadi - 10 minute wonder recipe series

Okra has always been one of my favorite veggies ever since childhood and this recipe is well - liked by everyone in my family.

Enjoy!


Okra and yoghurt Side dish / vendakkai thayir pachadi recipe:
--------------------------------------------------------------

Serves: 4
Prep/cook time: 10 minutes

Ingredients:

Okra - 1 pound cut into thin roundelles
Fresh Cut Onion - 1
Low-fat or non-fat yoghurt - 1 cup
Green chillies - 3
For seasoning: Mustard seeds, cilantro - few sprigs, cummin powder, salt and pepper, cooking oil - 2tbsps

Method:

In a frying pan, add 1 tbsp of cooking oil and when it heats up, add the mustard seeds and when they begin to crackle, add cut okra and onions

Let okra and onion fry well, till it gets crisp. This takes about 6 to 7 minutes on a medium high flame(especially if the okra slices are thin)

Then in a mixing bowl, add the yoghurt and other seasonings...finally add the cooked okra and onion.

Mix well and serve chilled or at room temperature.

This dish makes a great accompaniment for rice as well as rotis.

Sunday, January 31, 2010

Easy Tangy Green Beans Salad with a Crunch


Easy Tangy Green Beans Salad with a Crunch Recipe:
********************************************************************
Serves: 4
Prep/Cooking time: 15 mins.


Ingredients:
-----------


Green beans - (cut in 1 inch long pieces)


Red onion - 1 (cut in thin, long slices)


Green chilli peppers - 2 or 3 (slit in thin, long slices)


Roasted almonds - 4 or 5 crushed into medium-size pieces


Garlic powder - 1tsp


For seasoning and salad dressing: mix together salt(according to taste), black pepper - 1tsp,


lemon juice(or vinegar of your taste) - 2 tbsp, light olive oil (could be subsituted with peanut oil)- 1tbsp


Method:
--------


Cook the cut green beans in boiling water for 5 or 6 mins. They taste better in the salad when they still retain the bright green color even after cooking. That way you know they are not over-cooked.


After taking off the heat, drain the boiling water and set aside the beans.


Then, optionally, you could shock the beans in cold water for a minute so that they retain the bright green color and do not overcook.


Then, in a bowl, mix the green beans with the sliced onion, cut green chillies, almonds and garlic powder.


Finally pour the seasoning/salad dressing ingredients on top and toss well together till well-mixed.


You could garnish the salad on top with lemon zest/cilantro. I used yellow boondi(Indian fritters) for garnish.
Related Posts with Thumbnails