Showing posts with label healthful decadence. Show all posts

Tuesday, May 4, 2010

Sweet and Wholesome Indulgences as Thank You! Updated...

Warning!!!! This entire week is going to be exceedingly sweet and indulgent because I have many thanks to give...in the past few months, I have been receiving many Awards from my wonderful fellow bloggers that I have not yet accepted...I could not think of appropriate dishes to offer as treats and thanks to my fellow bloggers...now...I think I do!!! So, here we go...I warn you that the next few posts may be exceedingly sweet!!! I have always been addicted to cacao...look at my posts for molten chocolate lava cake or chocolatey nutella cookies... so what else but chocolate comes to my mind, when I pick treats to share with my blogger pals!!!

But, you know it...always wholesome with healthful elements...like these beautiful yet truly non-fat energy bars/squares!!! After trying these, I might totally avoid the store-bought energy and nut bars...Oh by the way,  dont say I didnt warn you - these are extrrrrremely addictive.
Recipe for Chocolatey Fruit and Oat Squares :
Servings: 16 pieces(could vary depending on prefered size of bars)

Prep time: 15-20 mins
Cook time: 35-40 mins
Ingredients:
1/3 cup rolled oats(I used the old-fashioned kind)
1/3 cup (45 grams) all purpose flour
1/8 teaspoon baking soda
1/8 teaspoon baking powder
1/4 teaspoon salt
1/3 cup light brown sugar
1 cup crushed nuts(pistachio, walnut, pecans, hazelnuts, and/or almonds)
1 cup dried fruits- apricots/cherries/cranberries/dates/figs and/or prunes (pits
removed and cut into quarters)...I used a mixture of dried fruits
1/2 cup chopped semi-sweet chocolate (I used Nestle's choc morsels)
1 large egg
1/2 teaspoon pure vanilla extract

Method:
Preheat oven to 325 degrees F (160 degrees C) and place the rack in the center of the oven. Have ready an 8 x 8 inch (20 x 20 cm) square baking pan that has been lined across the bottom and up the two opposite sides with aluminum foil. Set aside.

In a large bowl, whisk together the oats, flour, baking soda, baking powder  and salt. Stir in the brown sugar, walnuts, chocolate and dried fruit.

Use your fingers to make sure that all the fruit and nuts have been coated with the oats/flour mixture.

In a separate bowl, beat (with a wire whisk or hand mixer) the egg and vanilla until light colored and thick (this will take a couple of  minutes).

Add the egg mixture to the fruit and nut mixture and mix until all the fruit and nut pieces are coated with the batter. Spread into the prepared pan, pressing to even it out.

Bake for about 35 to 40 minutes, or until the batter is golden brown and has pulled away from the sides of the pan. You could drizzle some melted chocolate over the bar and then let cool.

When cooled, lift the bar from the pan by the edges of the aluminum foil. Use a sharp knife to cut into 16 squares.

Can be stored for about 10 days at room temperature or longer if refrigerated. Makes about 16  squares.

Now, coming to my beautiful Awards: Here are some wonderful awards from some of my greaaaat blogger pals: Priya of Priya's Recipes, Nisha of Nisha's Kitchen, Jay of Tasty Appetite and Priya Mitharwal of Mharo Rajasthan...A BIG THANK YOU TO ALL THESE WONDERFUL BLOGGERS...YOU MADE MY DAY!!!

Update: Let me also mention that these awards were also showered on me by Jyoti of Panchpakwan, whose blog features not only recipes from all over the world...but specially, recipes from Karnataka and Maharashtra regions of India.

I would like to share these awards with all my blogger friends...I appreciate all of you and the wonderful efforts you put in every day TO MAKE & PRESENT the most awesome food...do feel free to accept these awards!!!

THERE ARE MORE AWARDS TO COME...MORE LATER!!!

As part of the rules for these awards I need to mention 5 of my favorite posts...which I will, in the next post...

Friday, April 30, 2010

Variety, Variety, Variety...Yummies from Blogosphere

The endless variety that one finds in Indian food never fails to amaze me...as a child growing up in India, our family lived in different parts of the country, made friends among people of different communities and of course, had the good fortune to taste and relish food from various states in India...yet even to this day, when I am blog-hopping, I visit a blog which presents a new dish which I have not yet tasted or tried to make(sometimes, have not even heard of it!)

"Muthias" belong to that "not yet tasted or tried to make' category for me...it is a savory dish from the western Indian state of Gujarat. It is a steamed dumpling(sometimes, fried too) that is vegan...extremely healthy since it requires very little fat and is made by combining some nutritious grains and lentils.

When I found recipes of this dish on the net...of course, the first stumbling block that I faced is that...there was way too much variety when it came to the recipes...each recipe called for a different mixture of grains/lentils...some required chickpea flour, while others required a combination of wheat flour, semolina and chickpea flour, some others required millet flour...the list goes on...that I essentially think, is what boggles the mind of the beginner when it comes to Indian cooking...the endless variety...BUT, variety can be a good thing...I find that the best way to  ease the confusion, is to go with recipes that call for familiar ingredients and that is what I did...of course, the recipe of one of our wonderful blogger friends came to the rescue!!!

Here, I have used a recipe for Muthias that came from the wonderful blog Simply.Food...authored by Nayna, who has a variety of wonderful and simple Gujarati recipes alongwith other cuisines in her space.

The verdict from my family was that this savory and tangy dish is a definite keeper plus it reminded us all of our own Southern Indian idlis(pancakes). Thanks, Nayna for this wonderful recipe that has appealed to me and my family in a big way...

Links: Original Recipe for Muthias as posted on Simply Indian Food

Notes/Variations: I have used bajra(millet flour) as called for in the original recipe but one could substitute that with fine semolina in the recipe...I saw quite a few recipes that used semolina...also, for the veggies, I used a mixture of fenugreek leaves and spinach leaves in place of the bottlegourd in the original recipe. Also, for the seasonings, I added some caro seeds(ajwain), some fresh cilantro leaves and lemon juice apart from the mustard, sesame seeds and dried red chillies.

I served this dish with a tangy, chutney filled with herbs and nuts, though it would taste good with any chutney/dipping sauce
Recipe for Muthias(as posted on Simply.Food by Nayna)
Serves: 3 - 4 people(I got 12 pieces)
Prep/cook time: 30 - 40 mins.
Ingredients:

8 oz wheat flour
2 oz besan flour(chickpea flour)
2 oz bajra flour(millet flour)
2 oz fresh chopped methi leaves(fenugreek leaves)
2 medium courgettes grated with skin on(bottlegourd)
1 teaspoon ginger puree
4 green chillies finely chopped
2 teaspoons salt
1 teaspon turmeric powder
1/2 teaspoon chilli powder
1 teaspoon eno salts
1 tablespoon oil
For tadka/seasoning:
1 tablespoon sesame seeds
2 tablespoons oil
1/2 teaspoon mustard seeds
2 dry red chillies

Method:
1. Add wheat flour,besan and bajra flour to grated courgettes.
2.Add the ginger, chillies,salt,turmeric and chilli powder oil and eno salts.
3.Make a dough using 1-2 tablespoons water.
4. Form small 2 inch sausage shapes (muthia shapes) and place in steamer .
5.Steam for 25-30 minutes and allow to cool
6.When cool slice the muthia into 1 cm rounds.
7. Heat the oil for tadka in a wok, when hot add the mustard seeds, red chilli and the sesame seeds.
8. Add the sliced muthia and stir fry till slightly crispy and takes colours.
9. Transfer to serving dish

Tuesday, April 27, 2010

Recreation of a Childhood Favorite...

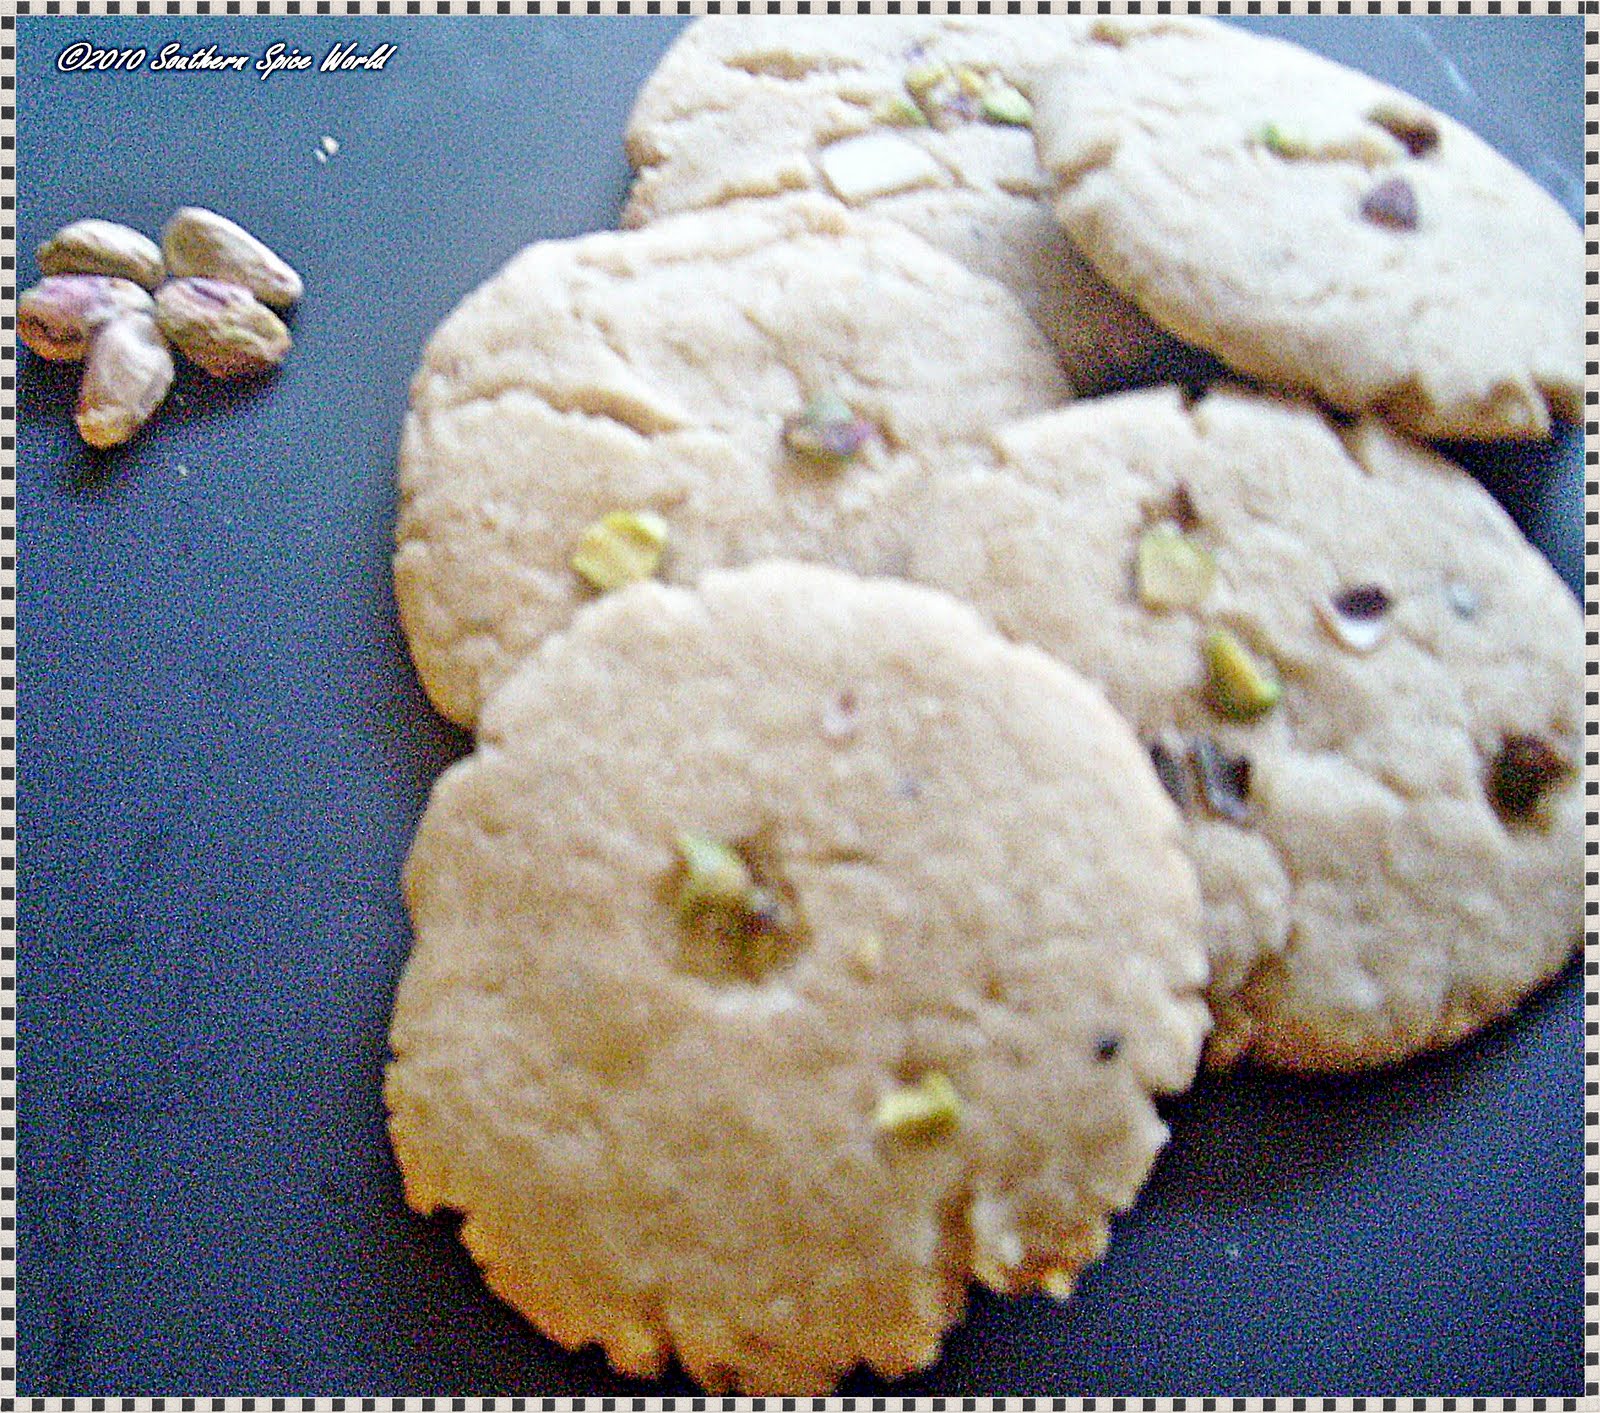
One of the biggest thrills I get from food blogging is the rediscovery of long-forgotten childhood favorites...I am sure a lot of us have these memories of foods tasted long ago, which we cherish for many years, either because of the unique nature/taste of that food or because of an event or circumstance associated with that food...I have such memories associated with an Indian cookie called "Nankhatai" because a lady, one of our neighbors, while we lived in Bombay, India(back when I was a kid), would bake it often and pass it onto us. At that time, we did not own an oven(baking was not a very commonly used cooking technique back then, for us)...so it was enthralling to taste home-baked goodies, hot off the oven. Plus, it was some cookie...light and crisp, almost airy and not overly sweet with a hint of nuts and cardamom...I truly loved it and I relished it many times back then...in fact, we shamelessly encouraged our neighbor aunty to make it more often!!!

After, we left Bombay and moved to Calcutta, it was forgotten and I probably never tasted it again..we had an oven at home then, still....until recently, when I was so thrilled to find recipes for it in various food websites. I was amazed to find the variety of ways to prepare this cookie...some recipes had all APFlour..some had a combination of APF and semolina flour and yet others had a combination of APF, semolina and chickpea flour...whew!!!

So, what is this "Nankhatai"? It is a shortbread-like cookie flavored with cardamom or nutmeg, a medley of nuts and was originally prepared using eggs and flour by the Parsi population in India, though later on Indian Hindus popularised an eggless version. I found a detailed video on the vahrevah blog with many interesting variations on the recipe which is what I followed, though I did make some changes to it, notably by reducing the quantity of sugar needed and ended up with a crunchy, mildly-sweet yet flavorful end-product...just like I remembered it!!! Here is to finding many more forgotten food faves...I know my family enthusiastically agrees with that thought...:))

Here is an interesting(read, detailed:)) history of this famous Nankhatai on the indiacurry website...in case you would like to know more about this delicacy(I did and I found more than I ever expected to know:)) This lovely, forgotten favorite goes to Priya's CWS - Cardamom Seeds event.

Recipe for Nankhatai:
Prep/cook time: 20- 25 mins.
servings: 14-16 pieces
Ingredients:
1 cup all purpose flour (plain flour or maida)
1/4 cup fine sooji or semolina
1/2 cup gram flour (besan)(optional) if used, increase sugar to 2/3 cup
Pinch of baking soda (a little less than 1/8 teaspoon)
1/2tsp baking powder
1/4 teaspoon green cardamom seeds coarsely powdered (ilaichi)
crushed pistachio, almonds for topping
few saffron strands
1/2 cup unsalted butter
1/3 cup sugar
1tsp yoghurt
Note: all ethnic ingredients are available at Asian/Indian grocery stores

Method:
preheat oven to 325 f

mix dry ingredients separately

mix wet ingredients well together

combine both...make soft dough ball...put in fridge for few mins...then shape into discs...press the mixture of almond-pistachio on each cookie

bake for 15 mins...will appear soft when removed from oven then will crisp up.

Tuesday, April 20, 2010

Me and Earth Day...Hmmm??!!!

So I dont believe in celebrating Earth Day...

Now, wait a minute...you are probably thinking...she is a selfish grinch who does not want to give back to Mother Earth!Like the storied Grinch who stole Christmas...am i about to steal Earth Day??

Well, before you label me like that, let me get on my soap-box and start my rant...my fave thing to do! I dont believe Earth Day should be a Single day of celebration...in my opinion, Earth Day should be more of a mind-set and a year-round celebration! What do I  mean?

Well, I believe that the best way to get our future generations to believe in the precious-ness(if that is a word) of nature is by slowly adopting a lifestyle where we Reduce, Reuse and Recycle in little ways...the other thing to  do...that is practical, would be to use more natural, simple ingredients as opposed to refined, highly-processed ingredients in our lifestyle, like say, in our cooking style(Hullo...Healthful Decadence!). Also, I dont mean throw out everything that is refined, artificial or processed...I believe in Moderation with everything in life...so I am making changes only where it is practically possible...with two kids, jobs and busy lifestyles, it is just not possible to eat all raw food, wear bark and leaves and go live in the heart of nature and extreme things like that, I think:))

What do you all think??? I would love to know!

So, here is to a more Earthy Lifestyle!!!

Now, here is a  recipe for moderation...mostly natural ingredients and one or two store-bought ones(what, I never said I am a tree-hugger:))

In this soup, I did not use any stock...just lots of Black-eyed Peas to give the soup some thickness...so this goes to MLLA # 22 hosted by RuchikaCooks and started by Susan.

Recipe for Southwestern Style Asparagus  and Black-eyed Pea Soup:
Serves: 2 or 3
Prep/cook time: 30mins - 35 mins.
Ingredients:
Black eyed Peas - 1 cup pressure-cooked till soft(takes about 3 or 4 whistles on my pressure cooker)
Asparagus - 1 bunch chopped
Green Bell Pepper - 1 chopped
Garlic and Ginger Paste - 2 tsp(or more if you like a garlicky taste, like me)
Tomato - 1 chopped
Cummin powder (jeera powder)- 2 tsp
Cooking oil - 1 or 2 tsp
For seasoning: salt, pepper, cilantro, thick yoghurt - 1 or 2 tsp per person and cilantro(tomato salsa would also be a good soup topper)


Method:
In a pan, add the oil and the ginger-garlic paste...let it cook for a minute or so.


Then, add the chopped vegs. and let it saute for a few minutes till the vegs. turn soft(takes 7 or 8 minutes)


Now, add the cooked black-eyed peas and all the seasonings except yoghurt and cilantro. Let cook for a couple of minutes and take off the heat and let cool for a few minuttes.


Finally, blend everything to a fine soupy consistency. If the soup seems too thick add a little water and let simmer again for few minutes.Serve warm or at room temperature topped with black pepper, cilantro, a few dollops of thick yoghurt(I like Greek Yoghurt here) and maybe, some tomato salsa.


This would be great served with some hearty bread, pasta or even as a dipper for tortilla chips.

Enjoy!

Thursday, April 15, 2010

Celebrations....Two of them!!

I am not one for huge celebrations...have always been overly-practical, even when it comes to celebration...prefer minimum fuss and fanfare!!! But there are some times and occasions when even the Queen of Practicality(myself!!!) wants to cheer...

Well, for one it is the beginning of a New Year in the South Indian calendar...so, Happy Tamil New Year / Happy Vishu to one and all!!! A new season and new year are definitely big reasons to celebrate....plus, the other occasion that makes me want to celebrate right now, is the fact that I am on my 50th post with this blog!!! Yaaaaahoooo!!!!

So, here is my two-in-one celebration recipe...of course, you know me...it is definitely Healthily Decadent...you will see...also here is a little verse, my daughter (the precocious poet, herself!) wrote to help me celebrate my blogging milestone!!!

"When my Mom started blogging...
  She started with a blog about cooking,
  And wanted to share it with Everyone,
  So her experience would be Fun!
  So, I made this poem for her 50th post,
  Now let us all make a toast! Yippee"

This dual celebration recipe for Carrot Beetroot Kheer makes its way to Shama's Payasam/Kheer Festival event. I tried out a variation to the Carrot Kheer I prepare usually, by adding some beets to it and of course, nut-obsessed that I am, had to also add some almonds and cashewnuts...which to my mind...make any dish richer and creamier than it normally would be...so here is a crazy yet surprisingly tasty kheer/pudding...let the celebrations continue...I hope!
Recipe for Carrot-Beetroot Kheer with a nutty flavor(South indian style pudding)-
Serves: 4
Prep/cook time: 25-35 mins.

Ingredients:
Carrots - 3 chopped
Beetroot - 1 small chopped
Almonds and cashew nuts - 1/2  cup chopped, combined
Milk - low fat - 2 to 2.5 cups
Sugar - 1/2 cup(could add more for sweeter kheer...I like my sweets to be not overly sweet)
Cardamom powder - 1 tsp
Saffron - few strands
For garnish - slivered almonds roasted(would taste better if roasted in a little ghee/clarified butter)

Method:
In a heavy-bottomed pan, let the milk boil on a low flame and keep stirring so it does not stick to bottom of pan.

In the meanwhile, blend together chopped carrots, beetroot and the almonds with a few more spoons of milk till you get a fine paste.

Then, add the blended carrot mixture to the boiling milk alongwith the cardamom powder and saffron strands.

Let the mixture cook on a medium or medium-low flame until it comes to a slow bubbling consistency...which takes 8 to 10 mins...do not boil too long or the mixture could end up becoming watery.

Once you a get slow rolling bubble consistency, take off the heat and add sugar...garnish with roasted slivered almonds.

This kheer tastes best when it has been chilled in the refrigerator for atleast a couple of hours...plus the consistency becomes creamier after refrigeration...

Enjoy!!!

Saturday, April 3, 2010

SPRING FEVER!!!!

Spring is in the air, the days are getting warmer....when I see all the signs of spring, I feel like celebrating the season. In fact, I would like to run through the grass, singing loudly...BUT STOP!! I am not like one of our Indian movie actresses, who celebrate the season thru song and dance, then I wonder what I can do to celebrate the season, that is practical...something that is practical and wont alarm my husband or make him think I am nuts:)))

Well, coming to the sensible ways to celebrate the season change, I have chosen to do some much-needed spring-cleaning in our house...some decluttering...lets see how far I progress with this noble intention...will keep you all updated. I also see the grocery stores filling up with seasonal fruits and vegs...fresh strawberries, pineapples, plums, peaches, corn...the variety is endless...well, the other practical way to take advantage of the changing seasons would be to use this lovely seasonal bounty in my dishes...so here is a light, refreshing springy dish my family and I enjoyed in the past few days...

The other way I decided to celebrate this season is to give my blog a light, springy template!
HAPPY EASTER TO ALL MY BLOGGER FRIENDS AND I WISH YOU A WONDERFUL SPRING TOO!!!
Recipe for light, fruity sundae:
Serves: 4
Prep/cook time: 7-10mins.

Ingredients:
Bananas - 2 cut finely
Pineapples - 1 cut finely
Plums and/or peaches - 3 cut in thin, round slices
Honey - 2 tbsp
Vanilla - 1 tsp
Dates - 1/2 cup sliced
Vanilla yoghurt (or vanilla icecream) - 2 cups
Milk - low fat - 1/4 cup

Method:
In a blender, puree cut bananas, pineapples, honey, vanilla and milk finely until you get a smooth sauce-like consistency.

In a serving glass,  arrange the sliced plums and/or peaches in a single layer at the bottom. Then, over that, spoon a layer of the icecream and then, a layer of the fruit puree.

Keep alternating couple more layers of the sliced fruit, icecream and  fruit puree.

Finally, garnish the top of the sundae with sliced dates.

Additionally, for a sweeter finish, you could drizzle some caramel sauce on top.

Wednesday, March 31, 2010

Comfort Food for Yummies from Blogosphere

So, it is time for another addition to the Yummies from Blogosphere series...I am really getting attached to this series and so is my family...they cant wait to see what I am going to try out next, considering there is SO MUCH VARIETY OF RECIPES on blogosphere!!!

Most of the recipes I bookmark as favorites for me to try out  later have special appeal not only because of taste and flavor and appearance but also because they have nutritional content. This week's recipe also belongs to that category...I chose an item from a blog which has been in existence for quite a while...nearly two years but this wonderful blogger still continues to post new recipes that are not only tasty but also simple and each recipe is different and unique in its own way.

So, this recipe is from our blogger friend Gita's Kitchen...and the recipe I chose is one for Palak Tofu(Spinach and Tofu Curry)...this recipe is very unique for me, because I have always made Alu Palak(Spinach with Potatoes) or Palak Paneer(Spinach with Indian Cheese) but never Palak Tofu...it was a very healthful yet completely tasty and creamy dish, that my entire family enjoyed. I wondered if the tofu would taste out-of-place in the curry but it was just wonderful...expecially because it was baked before adding to the curry to eliminate any raw smell.

Notes/Variation: I used some coriander powder and cummin powder (1 tsp each) in the curry...also seasoned the curry finally with some lemon juice(I like the combination of lemon juice with the spinach)...this is a very versatile dish that can be used as a side for rotis/bread/rice

Lovely dish...Gita! Thank you for this awesome recipe!
Links: Original Recipe for Palak Tofu as posted in Gita's Kitchen

Recipe for Palak Tofu:
Serves: 4
Pre/cook time: 25-30 mins.

INGREDIENTS:
Extra-firm tofu, 1 box.
Spinach, 1 large bunch.
Onion, medium, 1.
Tomato, 1.
Green chili, 1.
Garlic, 2 cloves.
Ginger, 1 small piece.
Red chili, 2.
Coriander seeds, 2 teaspoons.
Cloves, 2.
Cinnamon stick, 1 small piece.
Fennel seeds, ¼ teaspoon.
Salt as per taste.

PREPARATION:
Cut the tofu into small pieces. Spray a baking dish with any nonstick cooking spray and arrange the tofu pieces side by side. There should be sufficient space between each piece. Bake them at 350 degrees for 15-20 minutes until the tofu pieces turn brown. Set them aside. If needed the tofu pieces can also be sautéed in a pan with a teaspoon of oil until they turn brown.

Chop the onion and tomato into small pieces and slit the green chili into 2. Clean the spinach leaves and drain the excess water from the leaves. They need not be chopped as everything will be blended.

Heat a pan with some oil. When the oil is hot enough, add red chilies, coriander seeds, cloves, cinnamon stick, fennel seeds and fry them for a minute and remove them from the pan and let them cool. Now add the chopped onions, tomatoes, and green chili and sauté them for a few minutes. Then add garlic and ginger and keep sautéing until everything is well blended.

Add the spinach leaves and let them wilt along with the sautéed onion and tomato and let it cool. When the spice mixture and spinach mixture are cooled, blend them together into a smooth paste.

Put the blended mixture in the pan again, add salt and let it simmer under medium flame for few minutes until the gravy thickens. Then add the baked tofu pieces and stir everything well.

Serve hot with rotis.

Monday, March 29, 2010

Indian(ised) Pizza, anyone???

Friday nights are Fun Food nights at our house...not the usual breads or rotis or curry or rice...as the kids grow up and we keep trying to include more servings of different food groups to their daily diet, I find it necessary to come up with more interesting ideas for dinner...which is the only meal we all are together for, really(weeknights at least!)

I came up with this new idea for "Indianised "(Desi)Pizza for one of  our Friday Fun Food nights. Most of the pizza chains normally have a Hawaiian style fruit n veggie Pizza or some style of fruit-topped pizza nowadays, which gave me the idea of including fruit in this version of Indianised Pizza...hence, I came up with this Kurma-style Gravy Pizza. Plus, I was pumped up from the success of my previous venture with Indianised Pav Bhaji Pizza.

The kids thought this pizza was very colorful and so they liked it and of course, I was very happy to have taken care of a few servings of fruits and veggies with this dish...so, all said and done, a fun time was had by all that night:))

This Kurma style Gravy Pizza is making its way to Lavi's Global Kadai - Indian Flavored Pizza event...started by Cilantro.

Recipe for Kurma-style Gravy Pizza:-
Serves: 4
Prep/Cook time: 35-40 mins.(with store-bought pizza dough)


For Pizza Base/Dough: Paula Deen's Recipe and Emeril's Recipe on Food Network


For Gravy Base and Topping:
Ingredients:
Cauliflower - cut finely and cooked - 1/2
Carrots cut finely and cooked - 1
Apple - cut finely and cooked - 1
Pineapple - cut finely and cooked - 1/2
Green peas, shelled 1/2 cup and cooked
Tomatoes, chopped - 2 medium
Onions, chopped - 2 medium or 1 big size
Ginger, chopped 1 inch piece
Garlic 4 or 5 cloves
Grind the following to a fine paste: Unsweetened fresh or desiccated coconut - 3 to 4 tbsp, 1 tsp poppy seeds, 2 tsp fennel seeds
Oil - 2 to 3 tablespoons
Green chillies, chopped 3-4
Garam masala 1 tablespoon
Salt to taste
Fresh cilantro/coriander leaves, chopped 1/4 cup
Lemon juice - 1 medium or big size
Cashew nuts - 2 tbsp chopped for garnish, roasted
Raisins - 1tbsp
Cheese - mozzarella, grated 3 or 4 tbsp


Method:
Grind ginger and garlic to a fine paste. Preheat oven to 450 degrees F.


Heat oil in a pan and add three fourth quantity of onions. Sauté till light brown. Add green chillies and ginger-garlic paste. Stir-fry for half a minute. Then, add the ground paste and let come to a boil.


Add half the quantity of tomatoes and cook on medium heat for three to four minutes, stirring continuously or till oil separates from the masala.


Add cooked peas, cauliflower, carrot, pineapples and apples and one and half cups of water. Bring it to a boil and simmer for seven to ten minutes, pressing with back of the spoon a few times, till all the vegetables are completely mashed.


Add Garam Masala, salt and remaining tomatoes. Cook on medium heat for two minutes, stirring continuously. Then set aside.


Now, spread parchment paper/foil on baking sheet and place the pizza base/crust on it. Spread an even layer of the gravy curry on the pizza base.


Next, add the fresh cheese, cashew nuts, raisins and cilantro on top of the curry. Optionally, you could place some butter on the top of the pizza crust. Bake for 10 - 12 mins(or according to package directions for pizza crust)


Serve hot / at room temp.
Enjoy!!!

Sunday, March 28, 2010

Herbalicious Weekend Brunch

What is the perfect weekend brunch? Is it slices of warm toast with jelly/jam or is it golden parathas with yoghurt??? Is it light, fluffy omelettes or maybe it is steaming idlis/dosas(Indian savory snacks)??? It is so difficult to say which one is more perfect...they are all so scrumptious.

Well, we had this great weekend brunch which was enjoyed by everyone in our family recently: Herb - filled  Spinach Pancakes topped with grilled tomatoes. For such a scrumptious dish, the best part is that it is an iron-rich power-packed dish...

Hope my readers will be able to enjoy this brunch one of these days too, with their loved ones.
This wonderful spinach pancake dish goes to Priya's Pancake event and to Healing Foods Event- Spinach  hosted by Divya and started by Siri.

Recipe for Spinach Pancakes with an assortment of herbs:


Yields: 6 to 8 servings
Prep/Cook Time 20-25 mins


Ingredients
10 ounces fresh spinach, well washed and cut finely, or one 10-ounce package frozen chopped spinach, thawed and drained
cilantro and/or mint- 1 bunch cut finely(you could also use dill,
parsley or basil in this, in any combination)
2 cups all-purpose flour(or 1cup wheat flr + 1cup ap flr)
1/2 teaspoon baking soda,
1/2 tsp baking powder,
flaxseed - 1tbsp
salt
1/8 teaspoon grated nutmeg
1/2 to 2 cups buttermilk or thin yogurt
1 tablespoon minced lemon zest, optional,
ginger, garlic - minced (1tsp each),
green chillies - 2 cut finely
cut onion - 1
cooking oil(or butter) for cooking pancakes


Method
1. Heat large skillet over medium-low heat. Add a little cooking oil and add onions, ginger and garlic to it...when the onions start turning brown, add the cut spinach and other herbs to it and let cook for 4-5 mins. Then turn off heat and set aside.
2.In the meanwhile, in a bowl, mix together dry ingredients. Add 1 1/2 cups buttermilk(or yoghurt) to it. Add a little more buttermilk if batter seems thick; then add the cooked spinach mixture to it.
3. Place a teaspoon or two of cooking oil (or butter)in a skillet. When the skillet turns nice and hot(oil will start bubbling), ladle batter onto skillet, making any size pancakes you like. Adjust heat as necessary; first batch will require higher heat than subsequent batches. Add more oil/butter to pan as necessary. Flip only when pancakes are fully cooked on bottom; they won't hold together well until they are ready.
4. Cook until second side is lightly browned; and move from pan to serving dish.


Suggested garnish: lemon zest, cilantro, mint...I topped the pancakes with some grilled tomato slices and a little skimmed mozarella cheese.


Notes:
1.To make these pancakes even more protein-rich, you could optionally beat a couple of eggs into the batter.
2.If the batter looks or cooks too thin (that is, it spreads unappealingly over the pan), add a little flour, or some more spinach. If it is too thick, stir in some liquid -- milk, water, stock, whatever -- a spoonful at a time. The batter should be spoonable but not pourable.

Friday, March 26, 2010

Comfort Food Series: Fruity, Light and Flavorful South Indian Style Soup(Rasam)

I have been using fruits quite a bit in my savory foods lately, in chutneys and side-dishes and so on... and I actually find it refreshing(not to mention the fact that the fruits dont go to waste on my kitchen counter). Here is a light and flavorful South Indian style Soup or Rasam with the main ingredient being pears( I have tried it with pineapples, limes as well as apples).

The spice powder / spice mix I have used here is different from the usual Rasam powder that I use, which is available in most grocery stores or in the Asian Indian aisle of the supermarket. Here I used a simple, spice mix...a mixture of coriander seeds, some black pepper and  a touch of cumin seeds so that the fruity rasam(soup) would not be overpowering but still retain the flavor of the fruit while continuing to be tangy like traditional rasam is meant to be.

Here is the recipe and it would be a great accompaniment to hot rice as well as a warm appetiser/beverage by itself.

This fruity rasam soup goes to Nithu's Think Beyond the Usual - Fruits event as well as this month's CWS - Coriander Seeds  guest-hosted by RV and started by Priya of Priya's Easy n Tasty Recipes.

Recipe for Pear Rasam(South Indian style fruity soup):
Serves: 4
Prep/cook time: 20 - 25 mins
Ingredients:
Pears - 1 cut into chunks(any crisp variety more on the sweet side like Bartlett or Anjou or any others)
Tomato - 1 cut into chunks(any firm variety like vine tomatoes)
Green chilli pepper - 1 slit thinly
Tamarind juice - 2 cups
Jaggery - 1/2tsp(optional)
For spice powder: roast and powder coriander seeds(dhania) - 2 tbsp, black pepper - 2 tsp, cumin seeds - 1 tbsp
For seasoning: cumin seeds - 1 tsp, salt, turmeric, curry leaves - a few sprigs, cilantro


Method:
In a pan, add the tamarind juice and to it, add the cut pear and tomato, green chilli pepper, salt, turmeric , jaggery and spice mix.


Let the rasam soup boil well for atleast 10 mins, till it becomes bubbly.

In another frying pan, add a little cooking oil(or a tbsp of ghee) and when it heats up, add the cumin seeds and when they crackle, add the other seasonings and then add all these seasonings to the soup.

Serve hot or at room temperature with rice or as a warm appetiser/beverage.

Thursday, March 18, 2010

A Forgotten Favorite revisited / Baking and Me???!!!

Before I post a recipe, I have a confession to make...I am a stranger to the challenges and joys of baking...until recently, my adventures in baking were limited to figuring out if the supermarket carried the mix for the baked recipe I was planning to try out...if they did not carry it...sorry!! that recipe landed in the 'forgotten recipes' folder...

But all that changed dramatically when I recently entered into the world of blogging! Just the sight of all the baked goodies made me want to rush out and go on a wild baking spree:)) But then, I hit a wall...not literally. Though, I have been known to do that on my not-so-agile (read...clumsy klutzy) days! What I mean is that, recently my husband and I decided to change our family's entire eating/food style to a healthily decadent style....well I wont get into that story now, but you can read about  it in my earlier post on the subject. So. how could I go out and exercise my passion for baking without compromising on the health aspect.

Anyway, to make a long story short, I wanted to enter whole-heartedly into the tantalising world of baked yummies but...I wanted to make sure I did not digress from Healthfully Decadent cooking...so thus began my quest for turning all the wonderful baked goods recipes into healthy ones, as far as that was possible...so when I saw this simple, tasty and healthy(!!!) recipe for muffins on the back of a cereal box(of all places!)it just called to me to be tried out!

What attracted me to these muffins was the fact that, this recipe substituted fat and butter with a wonderful combination of many flavors...the other thing was that, it reminded me of a tasty, tasty muffin that I had relished a few years back at a small coffee shop in Washington DC...my husband and I were on one of our first trips to DC after being married...the tour guide was running late one morning and instead of stopping at a regular diner or breakfast place, he just stopped at a small coffee shop and asked us to get a quick breakfast. Well, we ended up feasting on one of the best muffins I have tried...maybe it was because the muffins were so light and flavorful...maybe it was because I was looking at the world thru rainbow-colored glasses after being recently married...I dont know. But the memory of those muffins has remained with me for a while.

So, I baked those muffins based on the recipe I found on the back of the cereal box with some of my own variations, based on the flavors I remembered and ended up with a very, very tasty end-result, that was very moist because of the number of liquid ingredients!!! The best addition was the pomegrannate juice(I used POM Wonderful) which meant I could reduce the quantity of ther liquid ingredients especially the oil and plus the juice is chock-full of anti-oxidants without much sugar! See for yourself...

This recipe goes to Jagruti's Joyful Eating Whilst Traveling event and to Champa's Bake-off event.

Recipe for Muffins loaded with flavor, fruit and chocolate:-
Servings: 12 muffins
Prep time: 10-15 mins
Cook time: 15-17 mins

Ingredients:
2 cups Oat Bran cereal like Quaker(you could  also substitute with 1 cup all-purpose flour and 1 cup oat bran cereal)
1/4 cup brown sugar
2 tsp baking powder
1/2 tsp salt (optional)
3/4 cup skim milk
1/4 cup pomegranate juice(I used the POM Wonderful brand because it has very little sugar)
2 egg whites, slightly beaten
1/4 cup honey or molasses
2 tbsp vegetable oil
1/4 cup frozen or fresh blueberries
1 medium mashed ripe banana
1/4 cup white or dark chocolate chips
a little orange zest(optional, but it gives the muffins a very fresh and zingy taste)

Method:
Preheat oven to 425 degrees F. Line 12 muffin cups with paper cups or spray the mold with some cooking spray.

Combine dry ingredients in a bowl and mix well. Add combined milk, pomegranate juice, egg whites, honey and oil. Add all the fruit and choc. chips.

Mix lightly till everything is combined...do not overmix.

Fill the prepared muffin cups till 3/4 full.

Bake 15 to 17 minutes or until golden brown. Serve with some fruit jam or as is.

Tuesday, March 16, 2010

Flavors from different parts of India - Yummies from Blogosphere!!!

I am so happy to post two recipes for this week's edition of Yummies from Blogosphere...they can be served as a neat combo in a meal. The greatest thing about these two recipes is that, they represent two very diverse sides of Indian cuisine...and they also represent, I think, the essence of the blog that they were originally posted on...A2Z Vegetarian Cuisine...the dynamic duo, Muskaan and Sadhana, who are the creators of that blog, use their space to present the best flavors from Western and Southern Indian cuisine.

So I decided to try out two wonderful recipes from those two cuisines that could be paired together, last weekend...the result...a wonderful, flavorful meal that represented some of the best flavors from Indian cuisine!!!  After this successful meal, my family has urged me to do this kind of combo more often...pairing up dishes from different cuisines and cultures...shakes up things and a departure from the normal, humdrum routine is fun...dont you think???

I chose to make Vaghareli Rotli, a wonderful yoghurt gravy dish from Gujarati(western Indian) cuisine and Eggplant Gothsu, a tangy Southern Indian side-dish...I served this combo with hot rotis(Indian bread)...it was heavenly!!!The best thing was that this flavorful meal was not only tasty but also extremely simple to make...no prep-ahead...no sweat-ahead:)))

Of course, I followed the original recipes as closely as possible...but you know me:)) I did make some minor changes...thats just me!!! For the Vaghareli Rotli...I added some fennel seeds(saunf) and fenugreek seeds(methi seeds) to the items for seasoning...and to the Eggplant Gothsu, I added some tomatoes, for some additional tanginess.

Here are the original recipes as posted on A2Z Vegetarian Cuisine for Vaghareli Rotli and Eggplant Gothsu...Enjoy!!! Thanks, Muskaan and Sadhana!

Recipe for Vaghareli Rotli:
Ingredients:

6 Leftover Roti (Whole Wheat flat bread)
1 C Yogurt, preferably sour
2 tsp Besan ( Bengal gram flour)
Water to dilute
1/2 tsp turmeric powder
1/2 tsp red chilli powder
1/2 tsp garam masala powder
1/2 tsp coriander-cumin (dhana-jeeru )powder
lemon juice according to taste if yogurt is not sour
1 Tbsp Cilantro, Chopped
Salt to taste.
For tempering:
1 Tbsp Olive / Canola Oil
1/2 tsp Mustard Seeds
1/2 tsp Cumin Seeds
2 Slit Green Chillies
Few Chopped Curry Leaves
1/4 tsp Hing (Asafoetida)


Method:
1. Mix yogurt and besan (gram )flour & add approximate of 1 Cup of water to dilute this mixture, whisk it nice to avoid lumps.
2. Heat oil in a wok, add mustard seeds, as it spluters, add cumin seeds, curry leaves, asafoetida, then pour above yogurt + besan mixture to it, while constantly stir it.
3. Bring it to boil, add the rest of the ingredients, stir it, and now with your fingers tear apart the flat bread you made (leftover roti) into medium small pieces just like size of potato chips, and put it in this boiling yogurt sauce.
4. Once you add flat bread pieces into this sauce, stir it and put the flame off. Let it sit for a while, as these bread pieces will soak up all the sauce, leaving behind some gravy. Thats perfect consistency.
5. Its ready to serve hot, with some sprinkle of chopped cilantro.
                      
Recipe for Eggplant Gothsu:
Cooking Time: 20 min

Preparation Time: 10 min
Serves – 4


Ingredients
Egg Plant (small) - 4 to 5
Ginger - 1 inch piece
Onion (medium) - 1
Curry leaves - few
Green chilly - 2 to 3 or to taste
Oil - 1 tsp
Mustard seeds - 1/2 tsp
Urad Dhal - 1/2 tsp
Channa dhal - 1/2 tsp
Asafoetida - small piece
Tamarind - goose berry size ball.
Turmeric powder - 1 tsp
Rice Flour - 1 1/2 tsp
Salt to taste.
Garnishing:
Chopped Cilantro – 2 tablespoons
This is normally made by roasting the egg plant and peeling the skin and using the pulp inside. The eggplant I had was too small to roast and I didn’t have the time to bake it and peel and take the pulp out.


Method
1) Soak Tamarind in water.
2) Heat Oil and add mustard seeds, once they splutter well add urad dhal, channa dhal, and asafoetida.
3) Once the dhal browns a little add green chilly, chopped ginger, onion pieces and curry leaves.
4) Cut the egg plant into small pieces and add it to the above.
5) Now add turmeric powder and salt and cover it for a while till the egg plant gets cooked.
6) Once it is cooked squeeze out the tamarind pulp from the soaked tamarind using water and add it to the egg plant mixture.
7) This should be in-between consistency of rasam and sambhar, so add water accordingly.
8) Once the tamarind water boils well and the raw smell is gone, mix the rice flour in little bit of water and add the paste to this mixture.
9) Simmer for a minute or two till the gravy thickens and is not very watery and switch of and garnish serve with Pongal or Idli.

Saturday, March 13, 2010

TGIF + Unlikely Yet Scrumptious Combo!!!

So, Thank God its Friday(almost Sat...what the hey, its the weekend)...TGIF...the days seem to fly past nowadays and I love coming up with new recipes to post!!!

Its another weekend and I always try to make something fun and different on Fri. evenings!!!! Let me go back to something I served last Fri. at home...which was met with oohs! and aahs! from the kids...

Pav bhaji : According to wikipedia... is a fast food dish native to Maharashtrians and is popular in most metropolitan areas in India, particularly in the Maharashtrian city of Mumbai & Pune. (पाव भाजी, also transliterated as pao bhaji and pau bhaji). According to wiktionary... a Maharashtrian fast food dish served on (पाव) bread and garnished with coriander and chopped onions. For most desis, Pav Bhaji is a well-known dish that most of us have feasted on since childhood, even though the recipe might vary slightly in every household.

And, Pizza???...again, according to wikipedia...it is an oven-baked, flat, disc shaped bread usually topped with tomato sauce and mozzarella and then a selection of meats/vegetables and herbs depending on taste and culture. Modern pizza originated in Italy as the Neapolitan pie with tomato. In 1889 cheese was added. King Ferdinand I (1751–1825) is said to have disguised himself as a commoner and, in clandestine fashion, visited a poor neighborhood in Naples. One story has it that he wanted to sink his teeth into a food that the queen had banned from the royal court—pizza.

Now, you may definitely wonder why I talk about two such diverse foods in the same breath. After all, we have all heard this..."East is East and West is West and never the twain shall meet..." But I beg to differ when it comes to...Pav Bhaji Pizza!!!

This is a scrumptious dish we first ate at an entertainment/videogame arcade run by desi Indians, here in the Bay area...they have a restaurant where they sell among other things, this Indianised version of pizza... which has a pizza base and topping of pav bhaji curry and cheese, cilantro, onions...yummm! Since then, we have had three birthday parties for our daughter in that entertainment arcade(they specialise in kids' themed parties) and after the first time, when we served the pav bhaji pizza to our guests...we have requests every year from our friends to have her birthday party at the same arcade...they all say  they cant wait to try the pizza at her party:))

So, I made this last Fri. evening for my family...I used store-bought pizza base, but of course, you could make it at home...hope you all try this scrumptious dish and give me your comments.

This surprisingly wonderful recipe(normally, pizza is not my favorite dish, but loved this variation)... Pav Bhaji Pizza is making its way to Lavi's Global Kadai - Indian Flavored Pizza event...started by Cilantro.

Recipe for Pav Bhaji Pizza:-
Serves: 4
Prep/Cook time: 35-40 mins.(with store-bought pizza dough)

For Pizza Base/Dough: Alton Brown's Recipe  and Emeril's Recipe on Food Network

For Curry/Bhaji Topping:
Ingredients:
Potatoes, boiled and mashed - 3 medium or big size + cauliflower - 1 boiled and mashed
Tomatoes, chopped  - 3 medium
Onions, chopped  - 2 medium or 1 big size
Green peas, shelled 1/2 cup
Ginger, chopped 1 inch piece
Garlic 6 or 7 cloves
Oil  - 2 to 3 tablespoons
Green chillies, chopped 3-4
Pav bhaji masala 1 tablespoon
Salt to taste
Fresh cilantro/coriander leaves, chopped 1/4 cup
Lemon juice - 1 medium or big size
Onion - 1/2 cut finely for garnish(optional)
Cheese - mozzarella, grated 3 or 4 tbsp

Method:
Boil green peas in water till soft, drain, mash lightly and set aside. Grind ginger and garlic to a fine paste.

Preheat oven to 450 degrees F.

Heat oil in a pan and add three fourth quantity of onions. Sauté till light brown. Add green chillies and ginger-garlic paste. Stir-fry for half a minute. Add half the quantity of tomatoes and cook on medium heat for three to four minutes, stirring continuously or till oil separates from the masala.

Add  mashed peas, cauliflower, potatoes and one and half cups of water. Bring it to a boil and simmer for seven to ten minutes, pressing with back of the spoon a few times, till all the vegetables are completely mashed.

Add Pavbhaji Masala, salt and remaining tomatoes. Cook on medium heat for two minutes, stirring continuously.  Then set aside.

Now, spread parchment paper/foil on baking sheet and place the pizza base/crust on it. Spread an even layer of the curry/bhaji on the pizza base.

Next, add the fresh cut onions, cheese and cilantro on top of the curry. Optionally, you could place some butter on the top of the pizza crust. Bake for 10 - 12 mins(or according to package directions for pizza crust)

When the pizza comes out of the oven, drizzle some lemon juice on top of pizza...serve hot / at room temp.

Enjoy!!!

Tuesday, March 9, 2010

A Walk Down Memory Lane...Yummies from Blogosphere

Here is another addition to my Yummies from Blogosphere Series...as I said last week, my family enjoys this series  immensely and why wouldnt they...considering they get to sample foods from some of the best recipes on Blogosphere???!!! I must say that this recipe was very special because it also made me walk down memory lane...it brought back memories of my high school/college days in Kolkata, India...

So this recipe is from Jyoti who blogs at The Veggie Hut. In the original post, she talks about her life in Kolkata or Calcutta, as it used to be called in the past...I enjoyed reading about her favorite street food stalls in Kolkata...that made me relate to my own college years when my friends and I would take advantage of the convenient location of our college near a busy shopping area in Calcutta and rush off, after classes to gorge on the chaats/street foods which were aplenty in Russell Street or in the stalls outside AC Market. And the temptations were many...there was phuchka(pani puri), jhaal muri, ghughni, rolls and then of course, the heavenly chilled kulfi...sigh!!

I wonder if all those stalls still exist because it has almost been 15 years or maybe more, since I last went to Kolkata...but that is how I remember the city...with it unhurried and relaxed pace, wonderful foods and friendly people.

Anyways...coming back to the recipe...it is one for Moong dal chilla(a savory crepe loaded with lovely veggies)...I have eaten it many, many times at friends' homes and my mom has made it in the past...but I had never tried it myself , even though I do make a variety of dosas at home...so when I saw Jyoti's recipe...I immediately bookmarked it and now...with the beginning of my series...I had a chance to make it at home.

It is extremely easy to make...the dough/batter being wonderfully easy to work with(once you have the right consistency)...plus it is super healthy because it does not need any rice! Just protein-rich moong dal(lentils) and of course, the vegs.

I served it with a tomato chutney that we all love in my family, last weekend... though it would taste great with any kind of chutney/dip/sauce...the kids demanded more of it the next day and luckily I had refrigerated some batter and we enjoyed it a second time, too!!

Notes/Variations to original recipe: I followed the original recipe as much as possible...however I did add some shredded cabbage also to the veggie mixture and additionally, a tsp each of coriander powder and cummin powder to the spice mix...being that I am a spice maniac!

Awesome recipe, Jyoti and thank you for it!!!
Links: original post

Recipe for Moong dal Chilla(as posted on The Veggie Hut):

This recipe makes 6 chillas:

Ingredients:
1 cup washed split moong dal(lentils)

1 onion chopped finely.
1 large tomato chopped finely.
½ cup bell pepper chopped finely.
¼ cup coriander leaves chopped finely.
2 green chilies deseeded and chopped finely.
¼ turmeric powder.
½ red chilli powder.
1 ¼ cup water.
1 tsp salt or to taste.
Oil for shallow frying.

Process:
Soak the moong dal for 2-3 hours. It will double in its volume. Drain off the water and add 1 ¼ cup of fresh water and churn in the mixer to form a liquid paste. Add turmeric powder and red chilli powder. Add the salt just before making the 'Chilla'. The batter should have a dropping consistency just like dosa.

Keep the chopped veggies aside.


Heat a non stick pan. Grease it lightly. Take a ladle full of batter and drop it on the pan and quickly spread it on the pan in a circular motion to form a 6 cm radius circle. Sprinkle all the veggies all over it.


When the chilla changes color turn it over with a spatula and cook on the other side.


When done transfer it on a paper towel. Continue with the rest of the batter.


Serve hot with chutney and ketchup.
 

Related Posts with Thumbnails